


The Mac mini is having a moment. Its small footprint, low power draw, and Apple Silicon performance make it a near-ideal always-on machine — perfect for hosting AI agents, serving files and media, or running local LLMs.
This guide walks through everything you need to set up a headless Mac mini. We’ll cover:
- New AI workflows driving Mac mini sales
- Required settings for headless Mac mini setup: How to adjust system settings for a truly headless setup (FileVault, preventing sleep)
- Quirks to watch out for: Spoiler, dummy plugs are mostly a thing of the past.
- How to connect to your headless Mac mini remotely: Remote desktop apps, Workbench, SSH, and VPNs
What is a headless Mac mini?
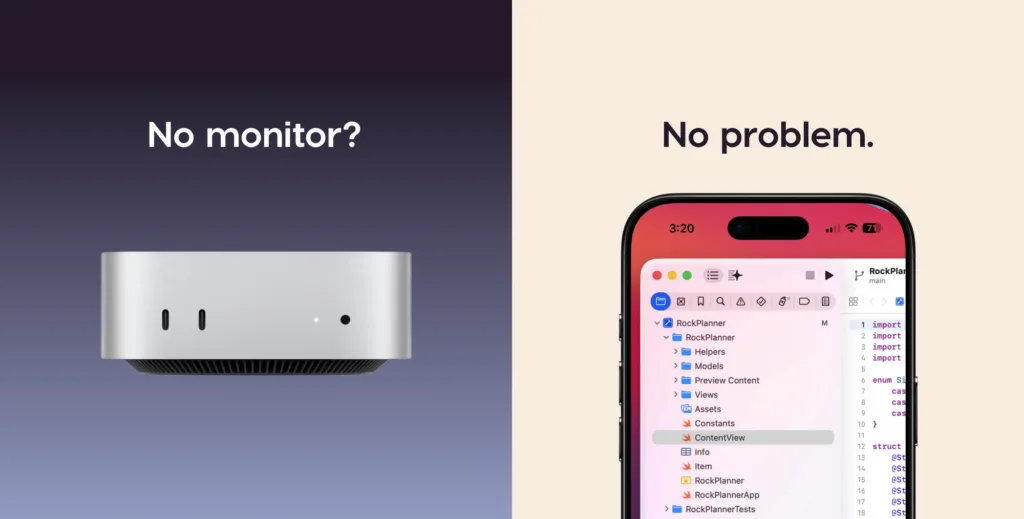
A headless Mac mini is a Mac mini running without a monitor, keyboard, or mouse physically attached. Instead, you access it remotely from another device like a laptop, iPad, or phone. The Mac mini continues running whatever tasks you care about (agents, servers, downloads, builds) and you check in on it as needed.
This setup is ideal if you want a dedicated machine for long-running work without sacrificing a desk monitor or using a loud, power-hungry tower. It’s also great for tucking a Mac out of the way in a utility room, closet, or rack.
The AI workflows driving the Mac mini boom
Much of the renewed interest in Mac minis in 2026 is being driven by AI agents: autonomous tools that run continuously on your machine, doing work on your behalf.
A dedicated always-on Mac mini turns out to be a near-perfect host for them. It’s silent, sips power, has desktop-class CPU and GPU performance, and runs full macOS, so your agent can read Apple Notes, send iMessages, trigger Shortcuts, and tap into system-level automation.
Three setups in particular are driving the wave right now:
Open Claw
OpenClaw is the open-source project that kicked things off. It’s an autonomous agent that plugs into your messaging apps like Slack, Discord, Telegram, WhatsApp, Signal, and more. OpenClaw actually does things on your behalf: managing files, running shell commands, automating browsers, and orchestrating multi-step workflows.
The Mac mini community adopted it enthusiastically enough that M4 stock sold out at multiple retailers earlier this year. A 16GB M4 is the entry point; if you want to run local models alongside it, 24GB or more is worth the upgrade.
If you want a step-by-step walkthrough for getting OpenClaw running on a Mac mini, we put together a full setup guide.
Hermes
Hermes is Nous Research’s self-improving open-source agent, released in February 2026. It’s designed to run as a long-lived service that accumulates context and capability over time. The longer it runs, the more useful it gets.
Hermes installs with a single command on macOS and is commonly paired with local models via Ollama or LM Studio. A 24GB Mac mini M4 comfortably runs the agent plus a 13B-parameter local model, and a 48GB M4 Pro opens the door to 30B+ models.
Perplexity Personal Computer
Perplexity Personal Computer (launched April 2026) takes a different tack: it’s a Perplexity-hosted agent that runs specifically on Mac and turns your machine into a persistent AI workstation. It can manage files, complete to-do lists, compare local documents against live web sources, and orchestrate tasks across more than 20 frontier models.
It’s available to Perplexity Max subscribers and runs on any Mac on macOS 14 or later, though Perplexity itself recommends a Mac mini for the always-on use case.
All three of these benefit enormously from a headless setup. You want them running 24/7, but you don’t want a Mac mini hogging a desk.
Required settings for a headless Mac mini setup
⚠️ Note: Adjust these settings before you unplug the Mac mini’s monitor. Getting a few settings right up front saves a lot of pain later.
FileVault and auto-login
FileVault is macOS’s full-disk encryption. It’s on by default on new Macs, and for most users that’s the right call. But it creates a problem for headless use: after a reboot, FileVault requires a password at the pre-boot screen before the network even comes up. No network means no way to connect in remotely, so your Mac is stuck waiting for a keyboard that isn’t there.
You have two practical choices:
Option 1: Disable FileVault & enable auto-login.
System Settings → Privacy & Security → FileVault → Turn Off. This is the simplest path for a headless Mac, especially one that lives in a physically secure location like your home.
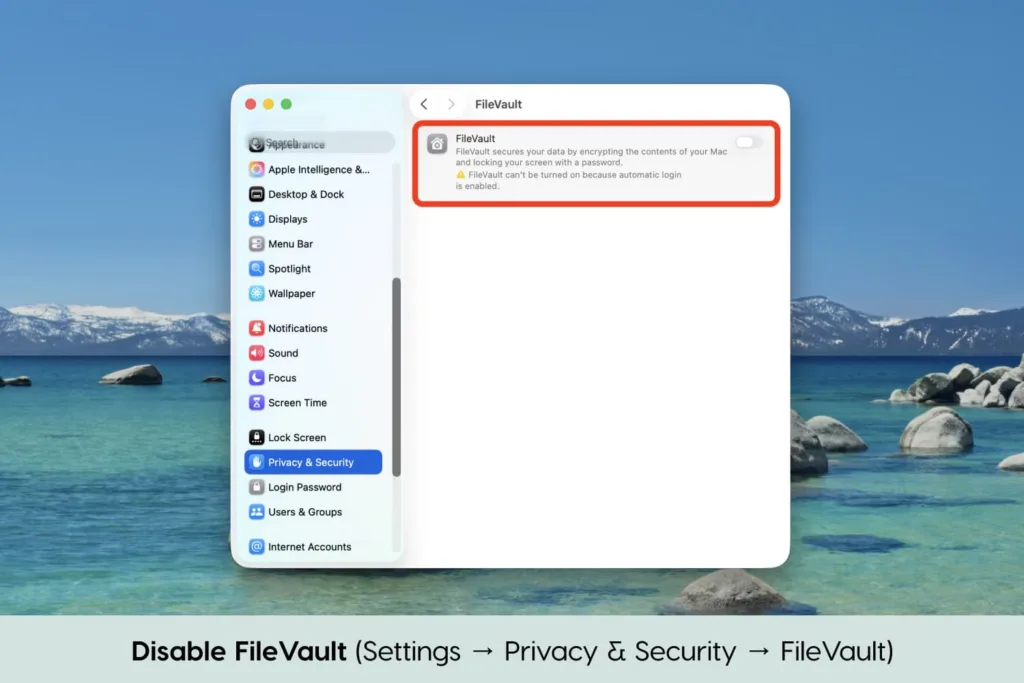
Once FileVault is off, you can also enable auto-login (System Settings → Users & Groups → Automatically log in as), which is what makes the Mac recover cleanly after a power outage or unexpected reboot.

Option 2: Keep FileVault on and accept that every reboot requires physical access.
If the disk contents need encryption (for example, the Mac lives in an office with lots of foot traffic), this is the safer option, but plan for it.
👉 Note: For most setups, including hosted Macs, the practical move is to turn FileVault off and auto-login on.
Preventing sleep
An always-on Mac mini can’t be asleep when you try to reach it. Head to System Settings→ Energy Saver / Battery (depending on your macOS version) and set the following:
- Prevent automatic sleeping when the display is off: On ✅
- Wake for network access: On ✅
- Start up automatically after a power failure: On ✅
Display sleep itself doesn’t matter on a headless machine, so a short timer is fine.
👉 Note: Workbench Remote Desktop manages these sleep settings for you automatically, so you can skip this step if you’re using Workbench. You can try Workbench free for 20 min/ day.

Do you need a dummy plug?
Short answer: no, but with a caveat.
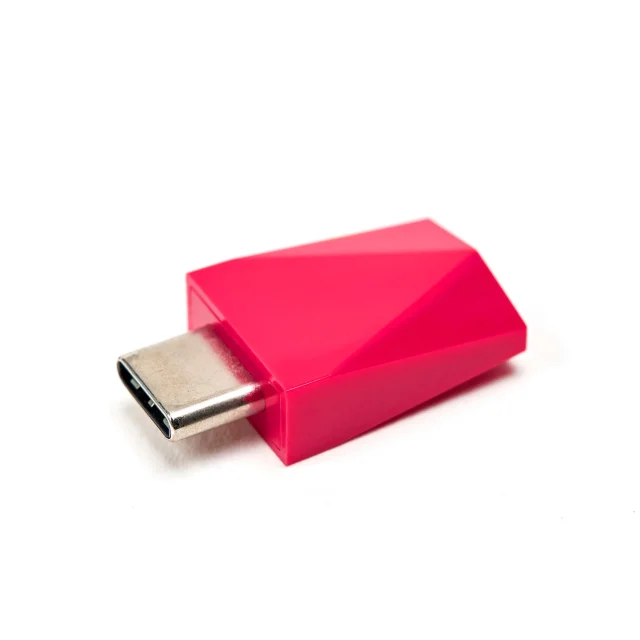
Older Intel Macs sometimes needed an HDMI “dummy plug” to fool the GPU into rendering at full resolution when no monitor was attached. Without one, the Mac would drop to a tiny virtual resolution, and remote desktop sessions looked terrible.
Apple Silicon Mac minis (M1 and later) handle this much better. In most cases you can unplug the monitor and the Mac will continue running normally, and remote desktop tools work out of the box.
⚠️ The caveat: By default Apple Silicon machines create a low-resolution 1920×1080 1x display. That won’t look great, and it will appear fuzzy when you’re connected from a Mac, iPad, or iPhone with a 2x Retina display.
🛠️ The fix: The fix is a remote desktop tool with built-in virtual display support, like Workbench (we call ours Unified Display).
Read the full guide: Do You Need a Dummy Plug for a Headless Mac Mini? →
How to connect to your headless Mac mini remotely
Once the Mac mini is configured, you need a way to actually reach it. Your options range from an all-in-one app (Workbench) to a do-it-yourself stack built around macOS’s built-in tools.
For a full overview of every remote access option, see our Mac mini remote access complete guide.

Workbench Remote Desktop
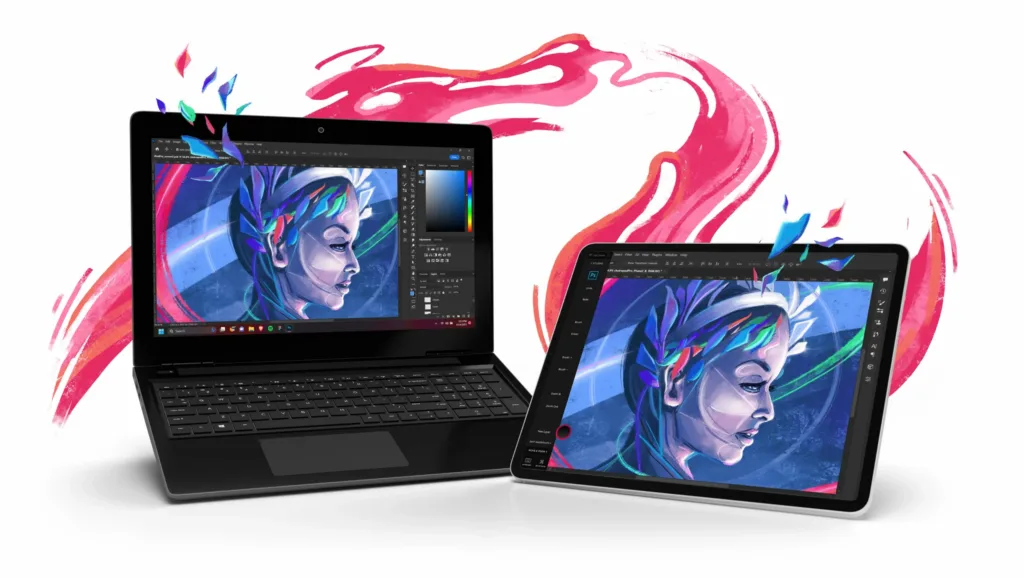
Workbench is the remote desktop tool we built at Astropad, and it’s designed specifically for the kind of always-on headless Mac mini setup this article is about. Think of it as the turnkey option: remote access, external connectivity, and display handling are all solved in a single app.
A few things make Workbench a particularly good fit for headless Mac mini use cases:
- Hassle-free setup. No port forwarding, no VPN, no router configuration. Install the app on your Mac mini and on whatever device you want to connect from, and you’re running.
- High-fidelity streaming. Workbench uses LIQUID, Astropad’s proprietary codec, to deliver perceptually lossless video with Retina support. Compared to VNC and Screen Sharing, the difference is immediate: text is crisp, color is accurate, and latency stays low even over cellular.
- Native apps for Mac, iPad, and iPhone. This is the big one for headless use. You can check in on a running agent from your phone while you’re out, send a voice-to-text prompt to nudge it, and see the actual desktop, not just a terminal.
- Secure by default. AES-256 encrypted sessions, and Workbench doesn’t record your display.
- Intelligent sleep. Workbench manages sleep settings for you, so your Mac is awake and reachable whenever you need it.
- Unified virtual display. Combines all of your Mac’s displays into a single virtual screen that matches the resolution of the device you’re connecting from. Handy on a headless machine, where the “display” is whatever you happen to be holding.

Connecting from outside your network
If you want to reach your Mac mini from anywhere (your phone at the airport, your laptop at a coffee shop, your iPad on a guest network), Workbench handles this out of the box. It’s backed by a global relay network, so connections route themselves no matter where you or your Mac happen to be. You don’t need to configure anything on your router, open any ports, or worry about a changing home IP address.
The DIY alternative is Screen Sharing or SSH plus a mesh VPN like Tailscale for external reachability. That works (and we walk through it below), but there are a few reasons to prefer Workbench for this use case:
- One app, not three. Workbench is a single install on each device. A Tailscale setup means Tailscale + Screen Sharing (or a third-party VNC client) + separate configuration on every new device you add. That adds up quickly when you want access from a Mac, an iPad, and two iPhones.
- Mobile-first. Tailscale plus VNC is awkward on iPhone and iPad. Workbench has native iOS and iPadOS apps built for touch, with gestures, Apple Pencil support, and voice-to-text input.
- Higher-fidelity connection. VNC over Tailscale is still VNC. Workbench’s LIQUID codec is purpose-built for high-fidelity streaming, so text stays crisp, color stays accurate, and latency stays low over cellular or flaky hotel Wi-Fi.
- No identity sprawl. Tailscale requires an auth provider (Google, Microsoft, GitHub, etc.) and per-device approval. Workbench signs you in once with your Astropad account and you’re done.
- Turnkey for non-technical users. If someone else needs to use the Mac mini (a family member, a collaborator), a mesh VPN is a tough sell. Workbench is “install this app and log in.”
The free tier of Workbench gives you 20 minutes of daily access, which is enough to kick the tires. If you’re running AI agents around the clock on a Mac mini, the extra polish over VNC plus a DIY VPN pays off quickly.
Other DIY Options
Built-in screen sharing
macOS ships with a screen-sharing server built in. Enable it under System Settings→ General→ Sharing→ Screen Sharing. From another Mac on the same network, you can connect via Finder (Network sidebar) or by typing vnc://your-mac.local into Finder’s Go → Connect to Server.
- Pros: Free, built in, and perfectly fine for occasional LAN access.
- Cons: It only works on your local network out of the box, which means connecting from outside your home requires a VPN or manual port forwarding. And it doesn’t work from an iPhone or iPad without third-party apps.

SSH
For anything command-line, SSH is the workhorse. Enable System Settings → General → Sharing → Remote Login, then connect from any terminal with:
ssh yourusername@your-mac.local
SSH is fast, scriptable, and perfect for running commands, tailing logs, or managing long-running processes with tools like tmux or screen. It’s the right tool when you know exactly what you want to do and don’t need to see a GUI.
- Pros: Free, built in, fast.
- Cons: The limits show up when you do need the GUI. You can’t interact with an AI agent’s browser window over SSH, you can’t watch a video render, and you can’t see whatever dialog box is blocking the workflow you care about.

Reaching your Mac from outside your network (DIY)
Screen Sharing and SSH work perfectly on your home network, but the moment you leave the house they stop working. If you’d rather build your own stack instead of using Workbench, you have a few options for extending access beyond your LAN.
Tailscale. The easiest and safest DIY path is Tailscale, a mesh VPN built on WireGuard. Install it on your Mac mini and on any device you want to connect from (laptop, iPhone, iPad), and they all end up on the same virtual network regardless of where they physically are. SSH and Screen Sharing then work exactly like you’re at home. You can ssh user@mac-mini or vnc://mac-mini from anywhere. There’s a generous free tier that covers personal use, no router configuration, no port forwarding, and no exposing your Mac to the public internet.
Traditional VPN. If you already run a VPN server (pfSense, UniFi, or a self-hosted WireGuard or OpenVPN box), you can use that instead. Same idea, different implementation. It’s more work to set up, but gives you full control of the network.
Port forwarding. Exposing Screen Sharing (port 5900) or SSH (port 22) directly to the internet via port forwarding on your router works, but it’s a bad idea for any Mac holding personal data. The public internet is a hostile place, and bots constantly scan for open VNC and SSH ports. If you go this route anyway, at minimum move SSH to a nonstandard port, disable password authentication, and use SSH keys. Screen Sharing should not be exposed directly.
Weighing all your options? We compared the major remote desktop tools in our Best Remote Desktop Apps for Mac guide.

Frequently asked questions
Can you use a Mac mini without a monitor? What is a headless Mac mini?
Yes. Running a Mac mini without a monitor (also called a headless Mac mini) is one of the most common ways to use one for AI agents, home servers, and always-on tasks.
A headless Mac mini is a Mac mini running without a monitor, keyboard, or mouse physically attached. You’ll need to configure a few settings upfront (FileVault, sleep, auto-login) and install a remote desktop app like Workbench so you can access it from your phone or iPad.
Do I need a dummy plug for a headless Mac mini?
No, not if you’re using modern software. Apple Silicon Mac minis (M1 and later) run fine without a monitor. The caveat is that by default they create a low-resolution 1x display, which looks fuzzy on Retina devices.
Workbench’s Unified Display feature solves this automatically without any hardware adapter. Read the full guide →
Does FileVault need to be disabled for a headless Mac mini?
For most headless setups, yes. FileVault requires a password at the pre-boot screen before the network comes up, which means you can’t connect remotely after a reboot.
Disabling FileVault and enabling auto-login lets your Mac mini recover cleanly from power outages without needing a keyboard. Read the full guide →
How do I access my headless Mac mini remotely?
You have several options: Workbench (purpose-built for headless Mac mini, works over the internet with no configuration), Apple Screen Sharing (free, Mac-to-Mac only, local network), or SSH (terminal access only).
For AI agent oversight from an iPhone or iPad, Workbench is the most practical option because it has native mobile apps and handles headless display automatically. See our Mac mini remote access complete guide for a full breakdown.
Can I access my headless Mac mini from my iPhone?
Yes. Workbench has a native iPhone app that gives you full remote desktop access, so you can see the screen, interact with apps, and use voice dictation to send prompts to your AI agents.
Apple’s built-in Screen Sharing doesn’t have an iPhone app, so a third-party tool is required for mobile access. Read the full guide →
How do I set up a Mac mini for AI agents?
The core steps are:
- Disable FileVault, enable auto-login, and configure sleep settings so the machine stays awake and reachable.
- Then install a remote desktop app like Workbench so you can check in on running agents from anywhere.
The full setup takes just a few minutes and the Mac mini can then run unattended indefinitely. For a complete walkthrough specific to OpenClaw, see our OpenClaw Mac mini setup guide.
What’s the best remote desktop app for a headless Mac mini?
- For AI agent workflows and headless setups, Workbench is purpose-built for this use case, with native iPhone and iPad apps, automatic headless display handling, and zero-config remote access over the internet.
- For occasional Mac-to-Mac access on the same network, Apple’s built-in Screen Sharing works.
- For teams managing multiple devices, enterprise tools like TeamViewer or Jump Desktop are more appropriate.
See our full remote desktop comparison →.
Full remote access for headless Mac mini. Free for 20 minutes/ day
Running your Mac mini as a dedicated AI computer? Use Workbench to check in remotely and make changes without connecting to additional monitors or peripherals.
- Fast, high-fidelity streaming. Interact with your Mac in real time with extremely low latency, even on high-resolution displays.
- Voice input for prompts. Dictate commands directly to your agents from your iPhone or iPad.
- Built for Apple devices. Remotely control your desktop from your iPad, iPhone, or another Mac.