Curious about what Thunderbolt Bridge is and how it works? This guide will explore the ins and outs, from how to set up your own Thunderbolt Bridge to troubleshooting tips. We’ll cover:
- What is Thunderbolt Bridge?
- Thunderbolt Bridge versus WiFi
- How to set up Thunderbolt Bridge
- Troubleshooting issues with Thunderbolt Bridge
- How to manually configure Thunderbolt Bridge using a Static IP address
Let’s dive into the world of high-speed data transfer!
What is Thunderbolt Bridge?
Thunderbolt Bridge facilitates high-speed data transfer between two Mac computers by utilizing Thunderbolt cables plugged into their respective Thunderbolt ports. This technology allows for seamless file sharing, internet sharing, and collaborative workflows.
For example, products like Luna Display can harness Thunderbolt Bridge to seamlessly turn your Mac or iPad into a second display. Thunderbolt Bridge significantly reduces latency compared to traditional WiFi connections.
Benefits of Thunderbolt Bridge for Mac users
- Backup and Synchronization: Use Thunderbolt Bridge for efficient data backup and syncing between your Macs. Opt for a Thunderbolt Bridge connection when transferring files with Migration Assistant—it swiftly transfers files, applications, settings, and more during the migration process compared to WiFi or Ethernet connections.
- Software Connectivity: Certain applications, like Luna Display and other third-party solutions, utilize Thunderbolt Bridge to boost connectivity and performance. Interested in learning how to use your iMac as a monitor? We’ve got you covered: Use Your iMac as a Monitor: A Step-by-Step Guide
- Internet Sharing: One Mac can share its internet connection with another Mac using Thunderbolt Bridge, allowing the second Mac to access the internet through the first’s connection.
- Creative Collaboration: Thunderbolt Bridge also supports collaborative workflows by allowing users to share and edit files in real-time, enhancing productivity and efficiency in team projects.
Thunderbolt Bridge vs WiFi Connections
WiFi has been a common solution for data transfer, though, in recent years, Thunderbolt Bridge has quickly taken over. While both technologies facilitate device connectivity, Thunderbolt Bridge’s direct, peer-to-peer link ensures more reliable performance and greater protection against system vulnerabilities compared to WiFi.
Advantages of Thunderbolt Bridge compared to WiFi
- Security: Thunderbolt connections provide enhanced security compared to WiFi, offering protection against wireless eavesdropping and hacking. Thunderbolt cables also support encryption protocols, making it ideal for safeguarding sensitive data.
- Versatility: Thunderbolt cables can support multiple devices such as storage drives, displays, and audio interfaces – something WiFi and even Ethernet can’t touch. This makes it the perfect solution for all endeavors, whether it be professional workflows, gaming, or media production.
- Reliability: Unlike WiFi, Thunderbolt offers a direct, peer-to-peer link between devices, ensuring consistent performance by eliminating any interference.
- Latency: Thunderbolt connections offer improved latency across devices, whether that be decreasing the time it takes to transfer files between your Macs or improving connection speeds when using software such as Luna Display. For instance, Thunderbolt Bridge allows Luna Display to significantly reduce latency, from 25ms on WiFi to just 4ms on Thunderbolt, enhancing Mac-to-Mac display connectivity.
How to set up Thunderbolt Bridge on mac OS
Ready to get started? Let’s get your Macs connected with Thunderbolt Bridge! Here’s how:
- Plug the Thunderbolt cable into the Thunderbolt ports on both of the Mac computers
- On each Mac go to System Preferences
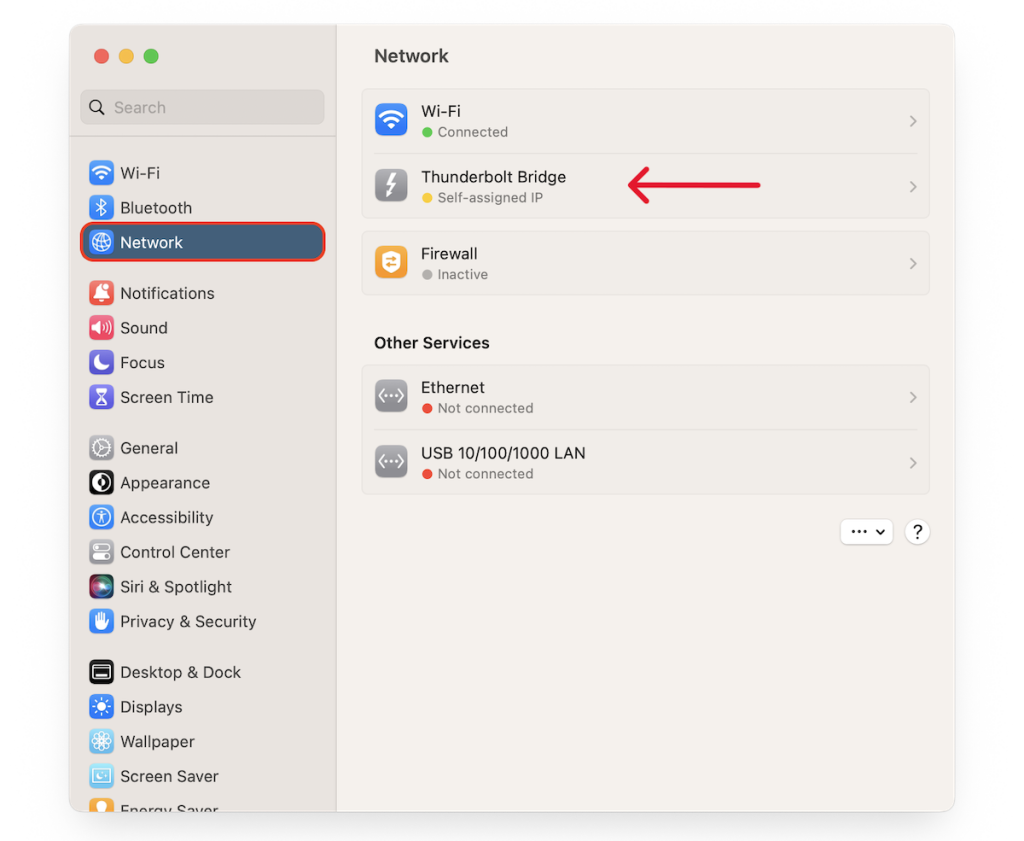
- In System Preferences, find and click on Network
- Look for the Thunderbolt Bridge section (If you see a “New Interface Detected” pop-up message, click OK to continue)
- When Thunderbolt Bridge is set up on both Macs, you’ll see Connected or Self-assigned IP. That means your Thunderbolt Bridge is good to go!
- Now, you’re all set to make the most of Thunderbolt Bridge for seamless connectivity and collaboration between your Macs.
⚠️ Note: If you don’t initially see a Thunderbolt Bridge option, click on the Action menu and select Add Service. Then, click on the Interface menu and select Thunderbolt Bridge. Type a name for the connection and select Create.
Troubleshooting Connectivity Issues with Thunderbolt Bridge
How to tell if Thunderbolt Bridge isn’t connected
Here are some common signs that Thunderbolt Bridge isn’t connected and set up properly:
- Connection Status: Check your network settings for “Not Connected” or “Unknown State”
- Data Transfer Issues: File transfers are slow or fail to progress at all
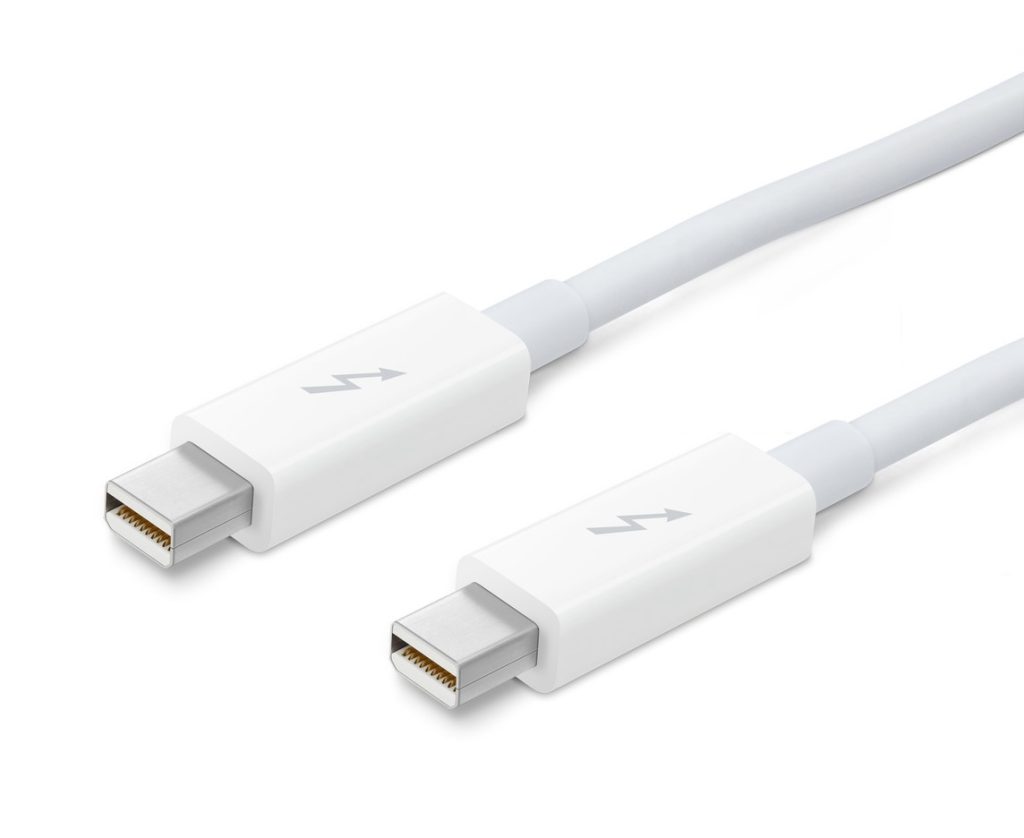
- Error Messages: Error messages such as “Cannot Use Thunderbolt Accessory” may mean your cable isn’t compatible with your Mac. Make sure the Thunderbolt cable is a true Thunderbolt cable. It should have a Thunderbolt symbol listed on the connector end of the cable.
How to manually configure Thunderbolt Bridge using a Static IP address
If Thunderbolt Bridge displays as “Not Connected” or “Unknown State,” it may help to manually configure the Thunderbolt IP on each device using a Static IP address. A Static IP is a manually assigned IP address that won’t change across time — it will always stay the same.
Let’s walk through the setup process:
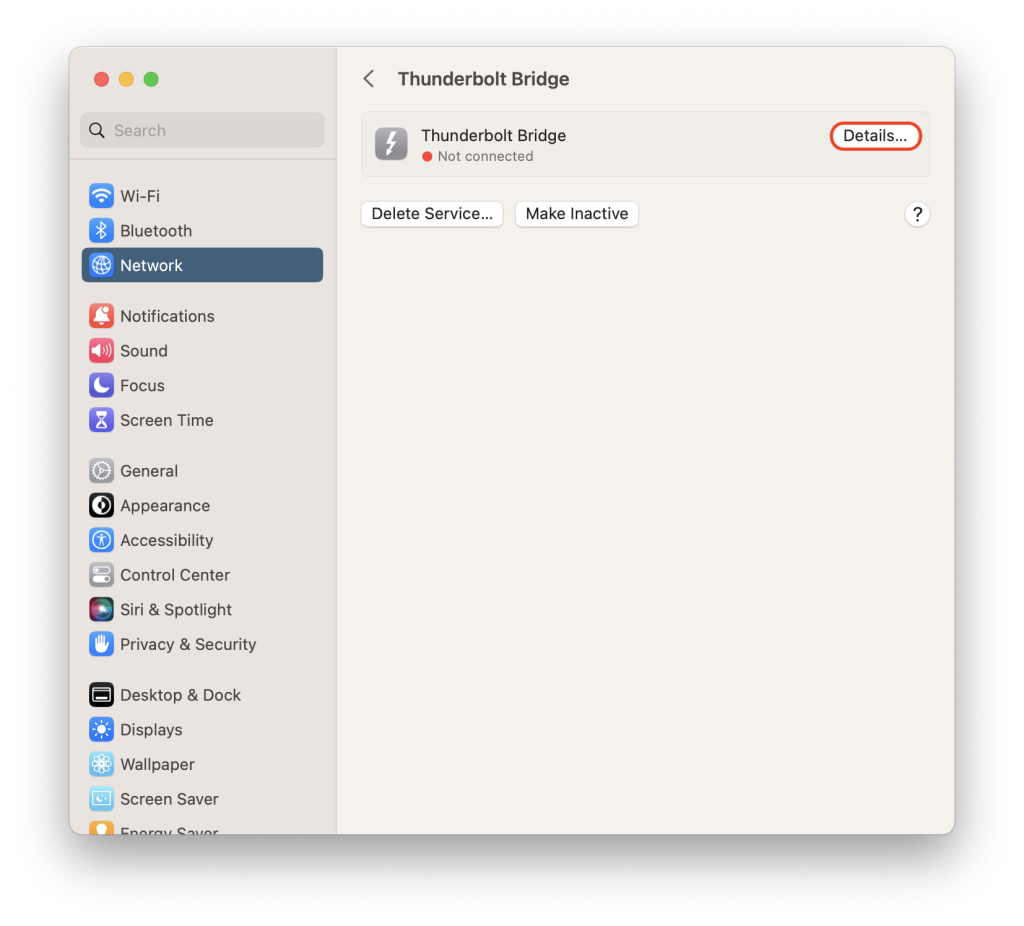
1. Navigate to System Preferences on both devices and click on Network
2. Select the Thunderbolt Bridge option and click on Details. . .
3. In the Details settings, select the TCP/IP tab
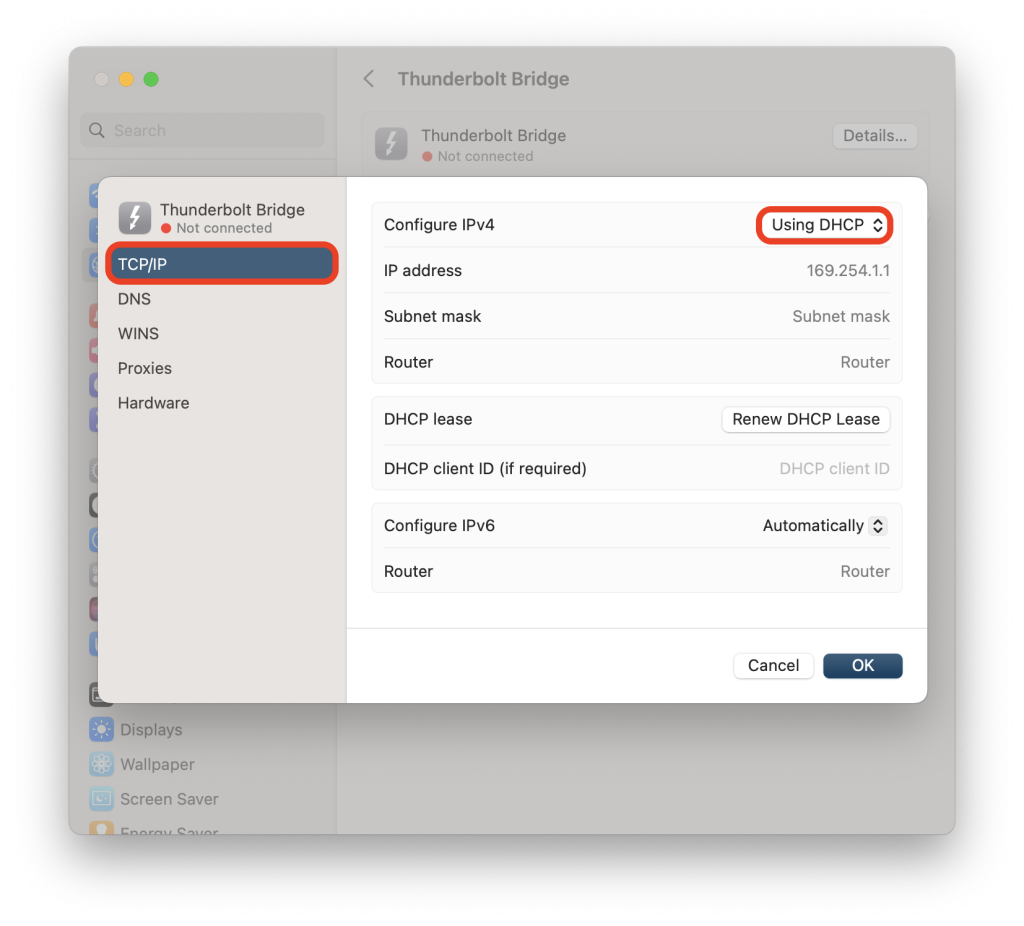
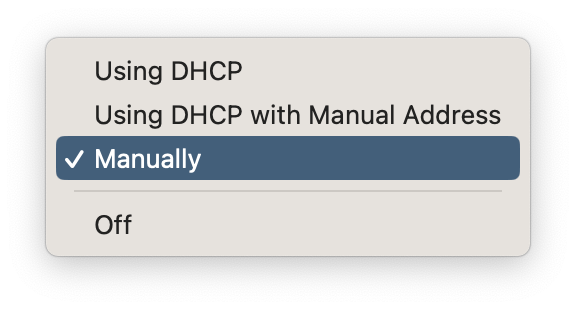
4. From the Configure IPv4 dropdown menu, choose Manually
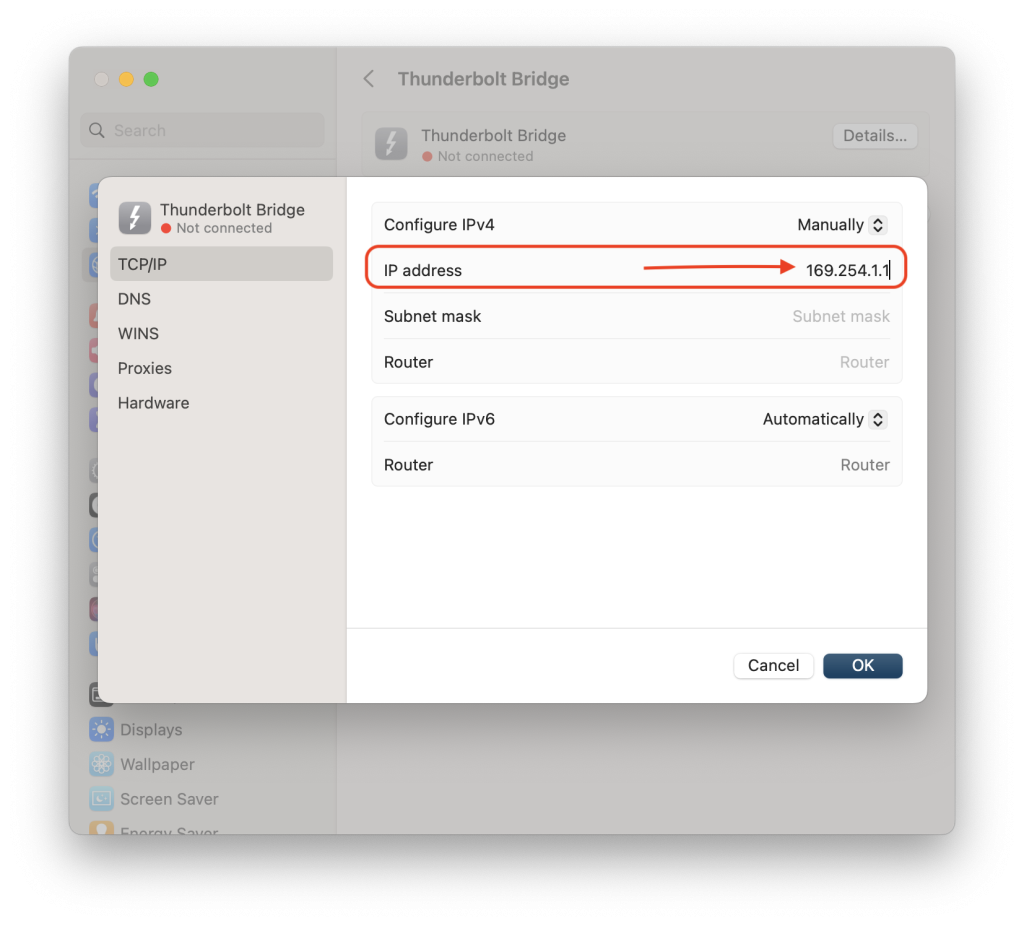
5. Enter the desired IP address for the Thunderbolt Bridge connection, making sure not to choose an IP address that is currently in use.
Typically, manual, or static, IPs will start with 169.254.x.x. As an example, set the main Mac’s IP address as 169.254.1.1 and the second Mac’s IP address as 169.254.1.2
6. Set the subnet mask, which is typically 255.255.255.0 for most networks — the subnet must be the same on both devices
7. Apply the changes and restart both computers.
8. Thunderbolt Bridge should be listed as Self-assigned IP or Connected
That’s all! Now you’re ready to start using your Thunderbolt Bridge connection.
Now that you’ve learned how to set up Thunderbolt Bridge and troubleshoot connectivity issues, you’re ready to harness Thunderbolt technology for a variety of tasks.
With its peer-to-peer connectivity and compatibility across various Mac systems, Thunderbolt Bridge offers you an efficient and reliable solution for real-time communication. Take the next step in your journey to streamline workflows, boost productivity, and facilitate seamless collaboration across Mac devices.
Turn your Mac or iPad into a wireless second display
Mix and match devices for a seamless workspace:
- Computer-to-iPad: Turn your iPad into a second display – works with Mac and PC. Luna harnesses the power of your desktop and extends your workspace onto a touchable device.
- Computer-to-Mac: Use any Mac as a second display for your Mac or PC. It also works on older Mac models (use your iMac as a monitor!)
- Headless Mode: Use your Mac or iPad as the main display for Mac mini and Mac Pro.