Looking for a way to use your iPad as a monitor for your Mac or PC? Look no further, this guide walks you step by step through how to use your touch-enabled, ultra-convenient iPad as a monitor for your computer.
recommended setup with Luna Display
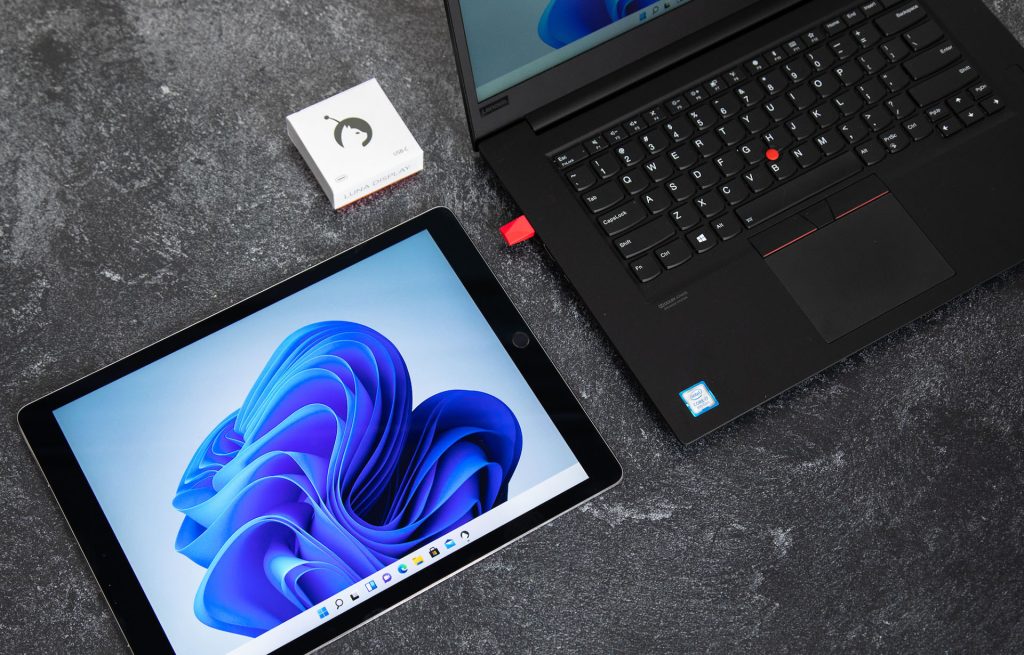
While there are multiple ways to configure your iPad as a monitor, I’ll share my recommended setup with Luna Display, which I use every day with my 2018 MacBook Pro. Let’s get started!
You should know there are a few other options for connecting your iPad as a monitor, but they have limitations:
- Sidecar – Mac only and both devices are required to have the same Apple ID. Often laggy, and does not provide a seamless monitor experience.
- Duet Display – Works with Mac or PC to use the iPad as a display, but with high latency. A subscription is needed for use, with more expensive subscription options for anything beyond a basic touch monitor.
Luna Display supports full retina resolution and is compatible with both Mac and PC. It can connect over Wi-Fi, P2P, and USB, and includes automatic Apple Pencil support – no subscription required!
Luna Display stands out from other solutions by also supporting headless, clamshell, and teleprompter setups.
Limitations of Sidecar when using your iPad as a monitor
A big motivator for wanting to use an iPad as a second display is to have a touch screen that can be used for a Mac or Windows operating system. While Sidecar has the crisp display part down, I’ve found that it is lacking in many other aspects:
- Touch is not intuitive which defeats the main purpose of having an iPad as a second display
- Gestures and the Apple Pencil input often are improperly detected
- The iPad does not function as a full seamless monitor, and windows cannot be freely moved between the two devices; clicking through a menu is required to move windows
- Clamshell setups, where the MacBook lid is closed during the use of the iPad as a display, are not supported by Sidecar
- There is no option to flip the screen contents for a Teleprompter mode
I am a stickler when it comes to ease of use, and I found that overall Sidecar did not meet my needs for a convenient and responsive second display.
Limitations of Duet Display when using your iPad as a monitor
I wanted to be thorough when looking into other popular solutions for using an iPad as a display for a computer, so of course I tested Duet Display as well. The results were not what I was expecting, given Duet’s popularity:
- A subscription is required for any level of use
- A cable is required for the initial setup and connection of your second display
- I had extremely bad lag and connection issues without a cable, where Luna and Sidecar had no issue at all on the same network with the devices the same distance from each other. As an example, Luna provided 7-25ms on WiFi and Duet Display averaged 95ms.
- The basic subscription does not cover the use of the Apple Pencil. You have to pay more, even if you plan on just using the pencil as a mouse.
Duet Display has a broad compatibility list, however, that comes at a monthly price. I was shocked to see how many features they hid behind an increasing paywall.
essentials for your Luna setup: what you need to begin
- A primary Mac or Windows PC to connect the iPad to
- iPad running iOS 13.1 or later
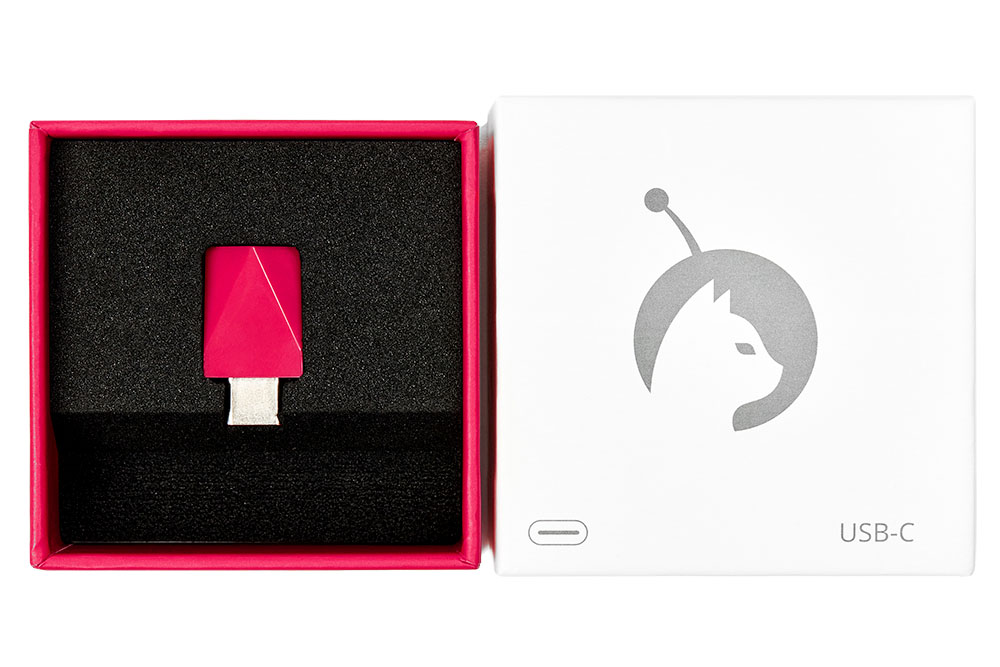
- Luna Display USB-C (available for $79.99)
- Optional but highly recommended for performance: Lightning or USB-C cable, depending on the age of your iPad. Typically the one that comes with your iPad will work, or any cable that supports syncing/data transfer
For this guide, I’m assuming you have a Mac or Windows computer that has at least one USB-C port available. Most modern computers have USB-C so that’s why I recommend it.
Older Macs or PCs may require Mini DisplayPort or HDMI connectors, which are supported by Luna Display but aren’t discussed in this guide.
setting up your iPad as a monitor: key steps
Step 1: Plug in your Luna Display
Once you have your Luna Display, you’ll need to take the dongle and plug it into your primary Mac or PC. By primary, I mean the computer you’d like to attach the iPad to as a display.
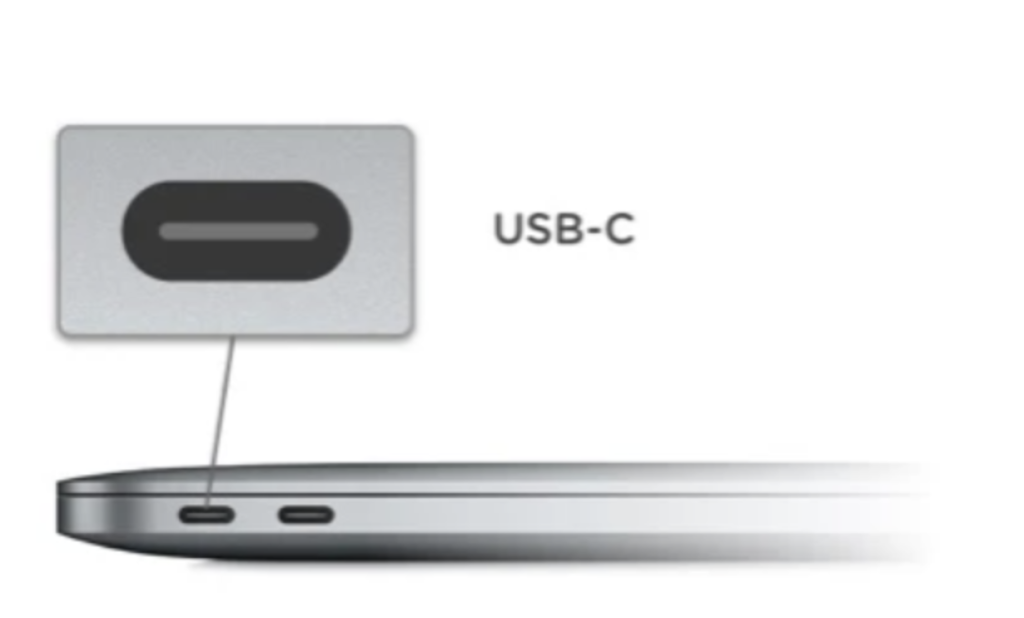
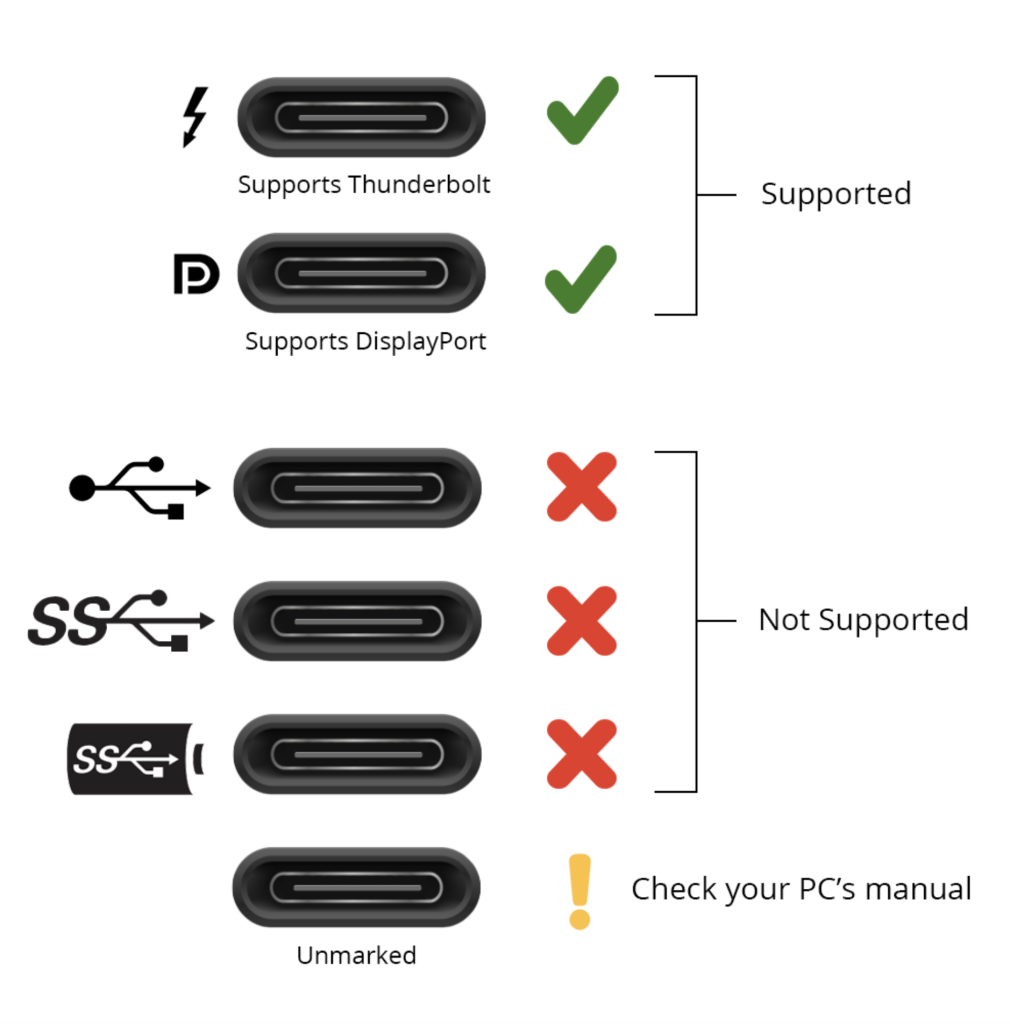
The Luna Display hardware must be plugged into a USB-C port that supports Thunderbolt or DisplayPort. All Mac USB-C ports support Thunderbolt or DisplayPort, but the same isn’t true for PCs where the situation is more confusing. On PC, you’ll want to plug into a USB-C port that has a Thunderbolt or DisplayPort icon. See the chart below for examples.
Supported USB-C ports
Step 2: Connect your iPad to your computer using a cable or Wi-Fi
Luna Display can connect via Wi-Fi, Peer-to-Peer, or USB cable when connecting an iPad.
For optimal performance, I recommend using a USB cable. This method bypasses the need for Wi-Fi, ensuring Luna’s connection is not affected by network traffic or outages.
Step 3: Download and launch the software
All the necessary hardware is plugged in now, so the final step is to load up the necessary software on your computers:
Download the Luna desktop app:
On the Mac or PC you plugged the Luna hardware into, download and open the primary Luna Display app.

Download the Luna iPad app:
Next, on your iPad, download and launch the Luna Secondary app. The Luna Secondary app is available through the Apple App Store, and you can find the iPad app download here.

The apps will walk you through setup, though if you get stuck, we also have a guide on how to get set up in our knowledge base.
Step 4: Use your iPad as a monitor!
At this point, your iPad and primary computer should automatically detect each other and the iPad should be configured as a monitor!
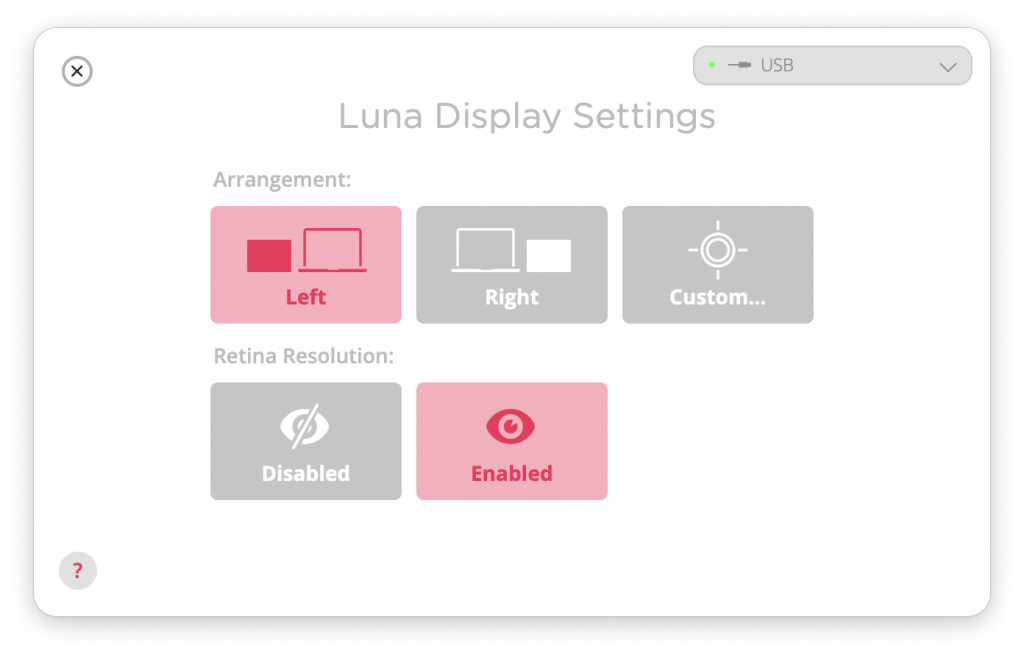
Recommended settings
There are a few more settings you should configure. In particular, I highly recommend enabling Retina Resolution so you get a crisp picture!
While new iPads are retina, not every older iPad is, so I recommend checking the specifications for your device if you do not see the option for Retina Resolution available.
That’s it! 😄 You’re all done. Go ahead and enjoy the convenience of using the iPad as a monitor for your Mac or PC!
If you need extra help tuning the performance or just need some general troubleshooting tips, check out the FAQs below.
Use your iPad as a monitor with Luna Display
the limitations of using your ipad as a monitor
Like any tech product, Luna Display does have limitations and it’s not recommended for high-motion content. For example, I wouldn’t recommend using Luna Display for gaming or video editing.
Since Luna Display is squeezing a high-quality Retina display through a USB cable or Wi-Fi connection, when lots of motion occurs on the screen (like from video playback or moving a window quickly) the screen can temporarily become pixelated before it renders in at full resolution. On an iPad, you will not likely see this occur often. Personally, when it does occur, it doesn’t bother me, as I use my iPad for things like chat windows, marking up documentation, or note-taking.
Read on for more tips on how to further maximize the performance…
tips for optimal performance
Since the iPad is a smaller screen and resolution than an iMac or MacBook, the performance will typically be smooth and consistent from the start. If you aren’t getting the desired performance out of your iPad as a monitor, however, there are a few preferences you can tweak.
What you tweak depends on if you prefer a crisp display with slower motion or faster motion with a slightly pixelated display.
- For the absolute fastest motion you’ll want to adjust the resolution.
- For the absolute clearest display, adjust the refresh rate.
👉 Note: Some of these performance tips only apply when used with a Mac. We hope to bring these settings to our PC software in the future.
Adjusting resolution
The best way to adjust the resolution with Luna Display is by using the Retina Resolution toggle that shows after connection.
Try turning retina resolution off to get more pixelation, but a much faster response on your iPad.
Adjusting refresh rate
*Only available on the primary Mac app
To adjust the refresh rate in the primary Luna Display app go to the menu File > Settings. A new settings window will appear, click “Luna Display” at the top of the window:
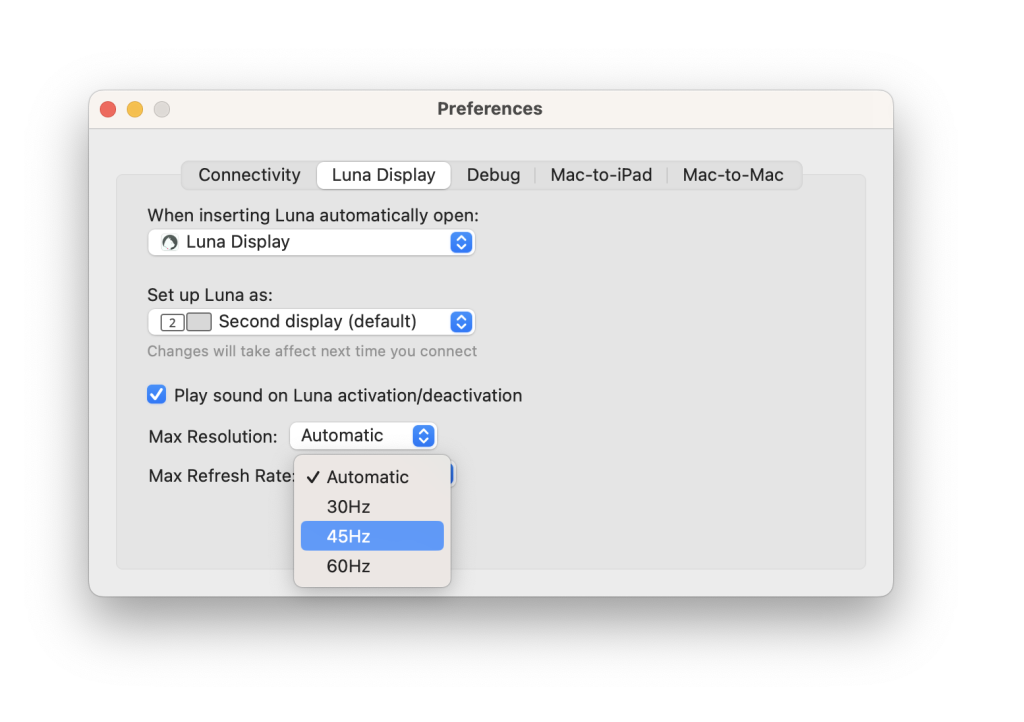
At the bottom, you’ll see a pop-up menu to adjust the Max Refresh Rate. By default, it’s set to 60Hz. Try setting it to 45Hz or 30Hz for a clearer but slower-to-update display. After adjusting this setting you’ll need to quit the Luna app and relaunch.
effective troubleshooting strategies
Be sure to check out our extensive help section for detailed troubleshooting information.