Is your Mac’s Menu Bar missing? The Mac menu bar is crucial for navigating system settings and accessing applications — its absence can get in the way of navigating your computer’s systems.
This comprehensive guide will dive into common reasons why the menu bar might disappear and provide step-by-step solutions to restore it.
What is the Mac menu bar and what does it do?
The menu bar at the top of your Mac screen is an essential tool for accessing various system-wide commands, application-specific menus, status indicators, and system controls. It includes options for system settings, software updates, and power management functions like shutting down or restarting your computer.

Each application on your Mac has its own menu bar, offering unique commands and options tailored to that application’s functionality.
Why does the Mac menu bar disappear?
There are several common reasons why the menu bar might go missing:
- Software Glitches: Temporary issues within macOS or specific applications
- Misconfigured Settings: Changes in system settings that affect menu bar visibility
- Third-Party Applications: Some applications may unintentionally hide the menu bar
⚠️ Are you running a second display software like Luna Display and your Mac menu bar is missing?
7 ways to troubleshoot a missing menu bar on your mac
Below, we’ll go over the most common troubleshooting steps to help get your menu bar back in working order:
Restart your Finder
Finder manages the desktop environment, including the menu bar, files, and windows. Occasionally, Finder can malfunction and cause the menu bar to disappear. Restarting Finder can help to refresh its processes and bring the menu bar back in view.
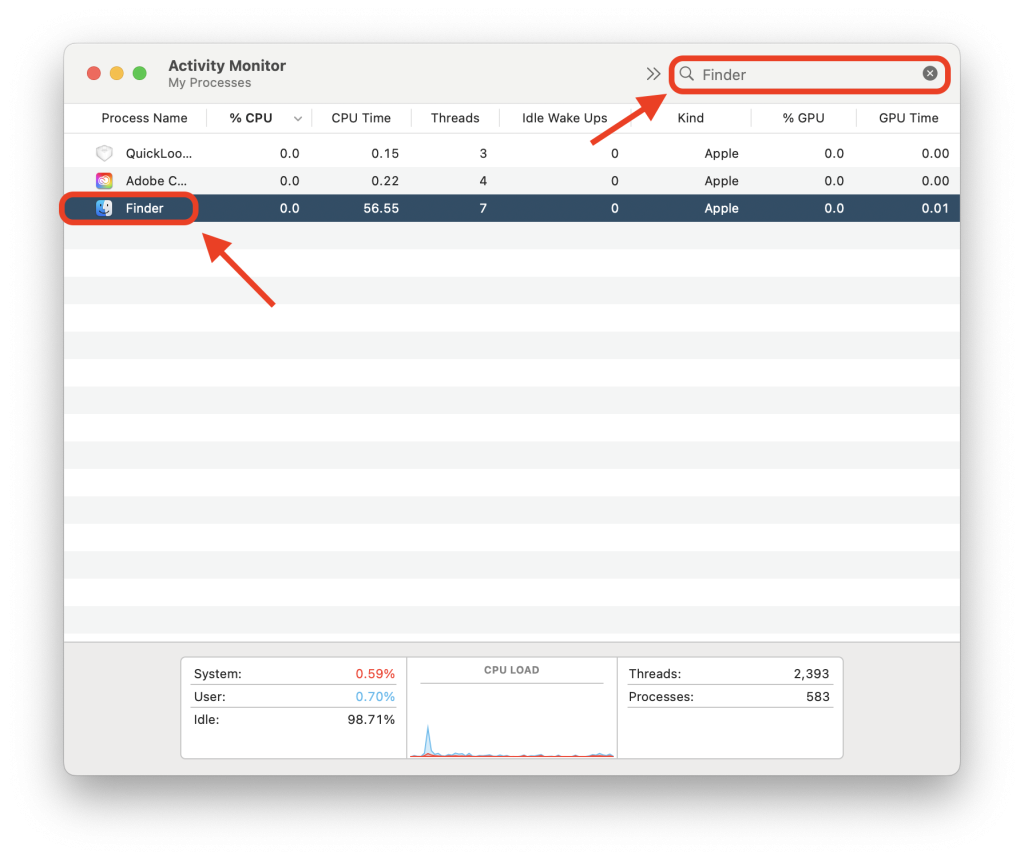
- Go to Applications > Utilities and launch Activity Monitor, or search for it using Spotlight.
- In the Activity Monitor window, use the search bar to search for Finder in the list of processes.
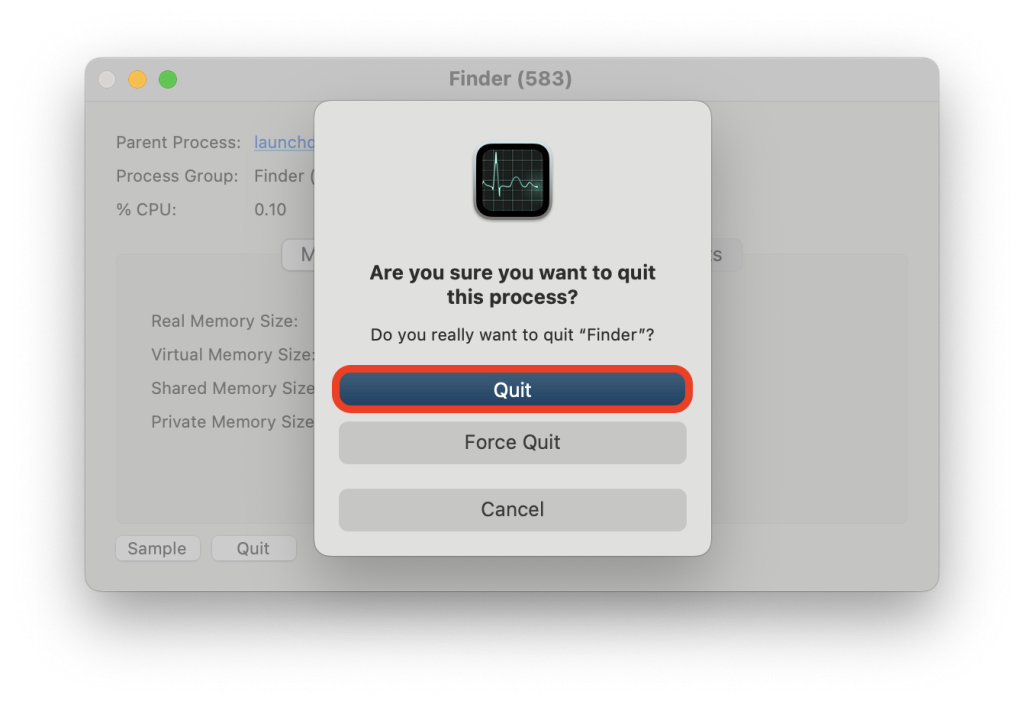
- Double-click Finder and select Quit in the pop-up window. To close the process, click Quit or Force Quit (if necessary) in the confirmation box. Finder will restart automatically.
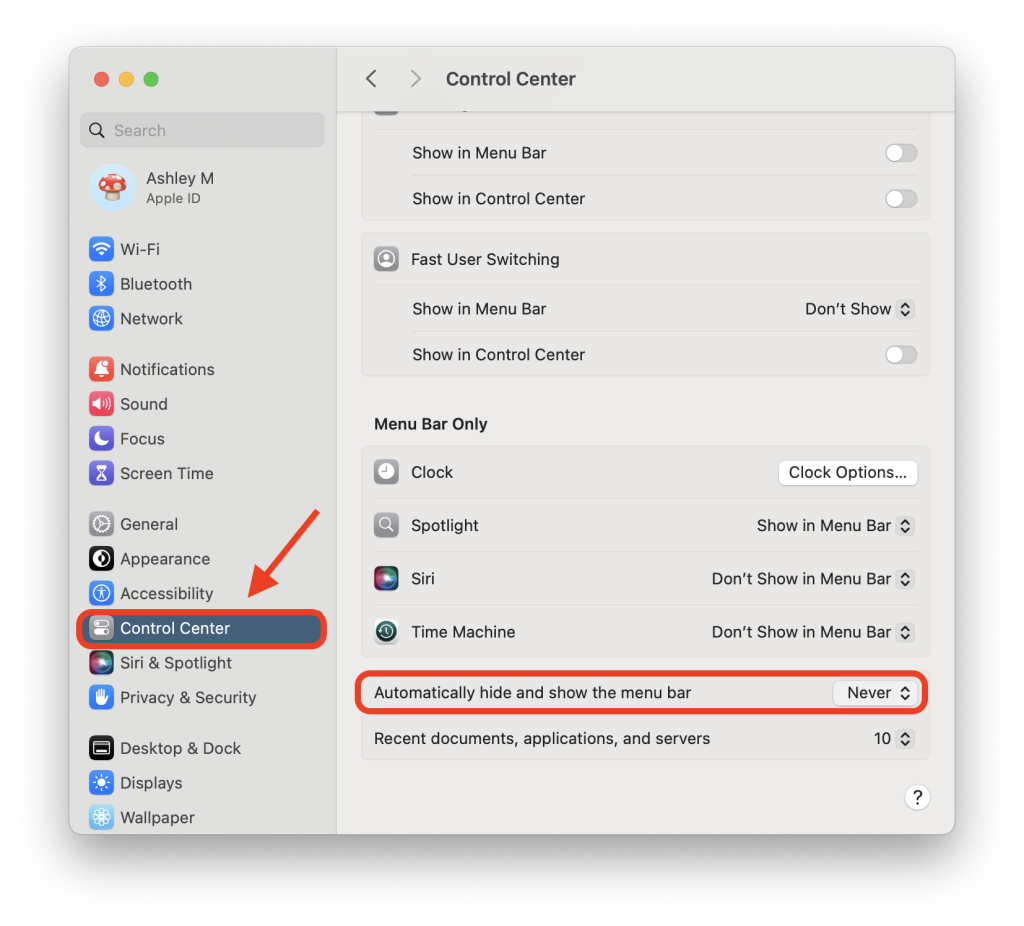
Check your System Settings and disable Automatically Hide
When Automatically Hide and Show the menu bar is enabled, it will hide the menu bar at the top of your screen when it’s not in use. The menu bar will only appear when you move your mouse pointer to the top of the screen.
While this provides a minimalistic appearance, it can remove important information from your display, such as showing the time, battery, and WiFi status.
How to disable Automatically Hide in macOS Sonoma and later:
- Click on the Apple logo in the top left corner of your screen and select System Settings (or System Preferences on older versions of macOS) from the dropdown menu.
- In the System Settings window, select Control Center.
- Scroll down to the Menu Bar Only section.
- Click on the drop-down menu under Automatically hide and show the menu bar and select Never.
How to disable Automatically Hide in macOS Ventura and earlier versions:
- Click on the Apple logo in the top left corner of your screen and select System Preference from the dropdown menu.
- In the System Settings window, click on Desktop & Dock.
- Scroll down to the Menu Bar section.
- Uncheck the option labeled Automatically hide and show the menu bar.
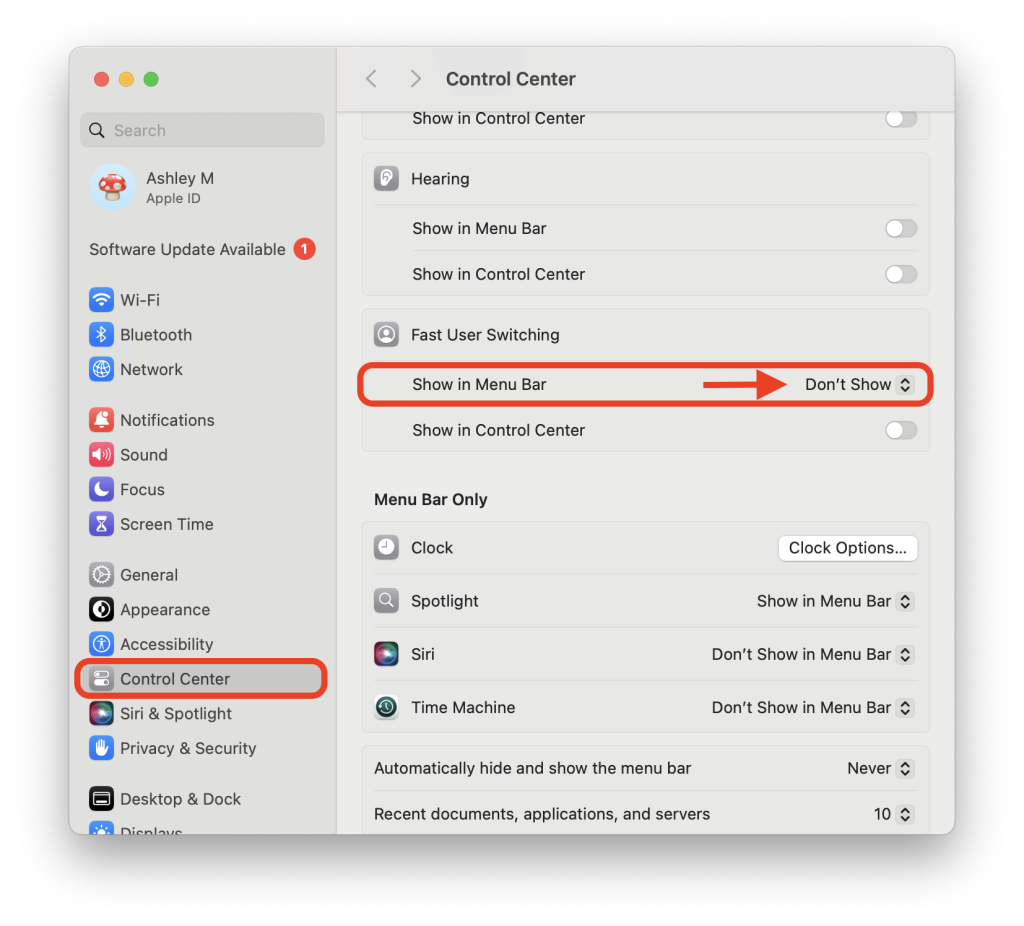
Turn off Fast User-Switching
Fast User-Switching allows multiple users to be logged in on the same Mac at the same time without logging out. Enabling this feature can cause conflicts between user profiles, which can potentially remove the menu bar at the top of the screen.
- Click on the Apple logo in the top left corner of your screen and select System Settings.
- In System Settings, click on Control Center from the sidebar.
- Scroll down to the Fast User Switching section.
- In the drop-down menu next to Show in Menu Bar, select Don’t Show.
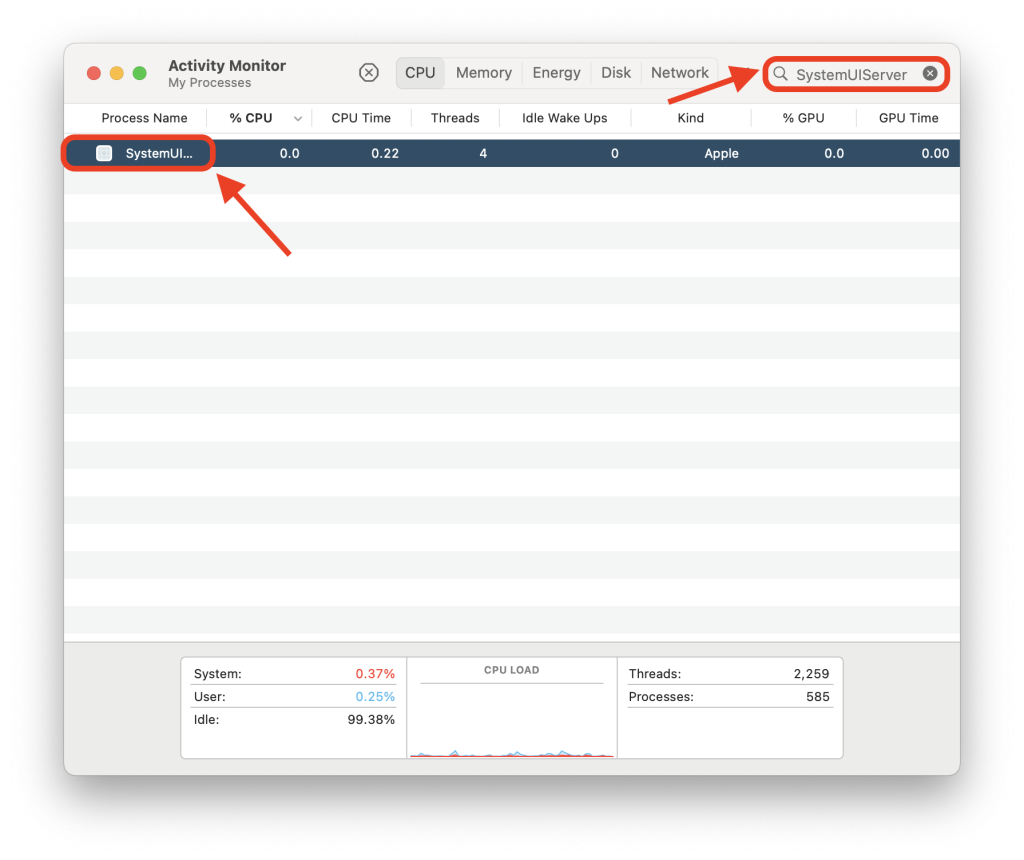
Reset the Mac menu bar
The menu bar is managed by a system process called SystemUIServer. Sometimes, this process can encounter glitches or become unresponsive, leading to the menu bar disappearing.
- Go to Applications > Utilities and launch Activity Monitor, or search for it using Spotlight.
- In the Activity Monitor window, locate SystemUIServer in the list of processes. You can also use the search bar at the top right to search for it.
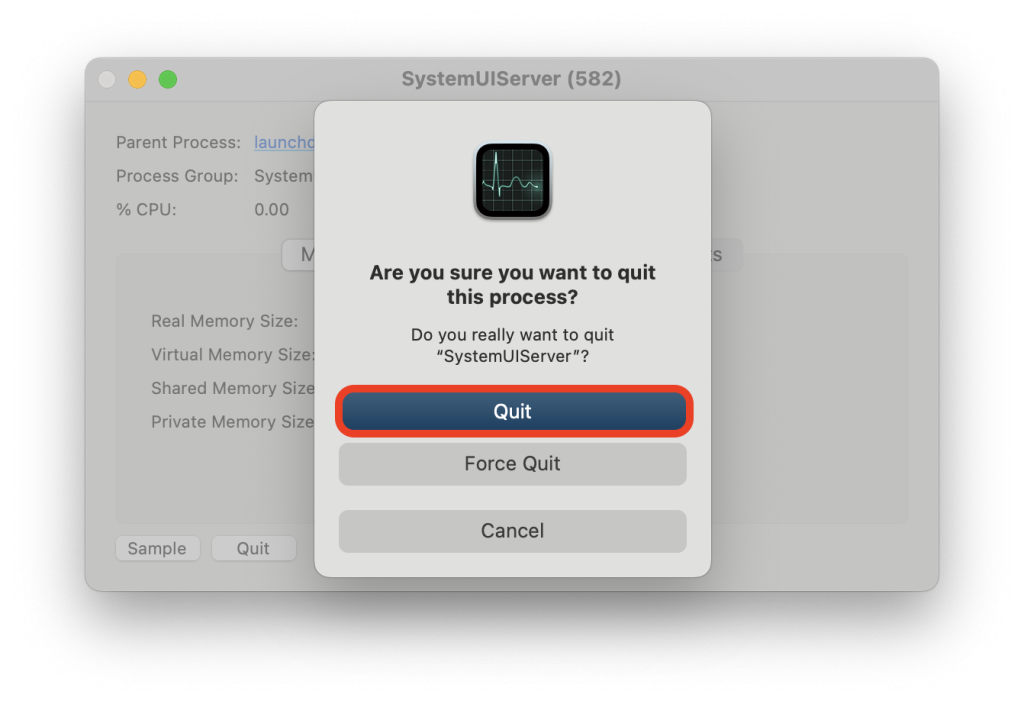
- Double-click SystemUIServer and select Quit in the pop-up window. Click on Quit or Force Quit (if necessary) in the confirmation box to close the process.
- The SystemUIServer will automatically restart, which will reset the menu bar.
Verify third-party applications
Recent installations might interfere by competing for resources or enabling certain settings that can remove the menu bar from the desktop.
- Go to Applications > Utilities and open Activity Monitor, or search for it using Spotlight.
- In Activity Monitor, look for any third-party applications that might be running. You can use the search bar at the top right to filter the list.
- Quit Suspicious or New Applications Actively Running:
- Double-click on any third-party application that you suspect might be causing the issue.
- In the pop-up box, select and click on Quit.
- Select Quit or Force Quit (if necessary) in the confirmation box.
Safe Mode Troubleshooting
Safe Mode loads only essential system components while disabling third-party extensions and login items. This can help uncover underlying system issues related to software, setting, or application conflicts that may cause the menu bar to disappear.
For Intel-based Macs
- Power on or restart your Mac.
- Immediately press and hold the Shift key. Release the Shift key when you see the login window.
- Log in to your Mac. You might be asked to log in once more.
For Apple Silicon Macs (M1, M1 Pro, M1 Max, M2, etc.)
- Turn on your Mac and continuously press and hold the power button until you see the startup options window.
- Select your startup disk, then press and hold the Shift key while clicking Continue in Safe Mode.
- Log in to your Mac. You might be asked to log in once more.
Verifying and Exiting Safe Mode
- Once your Mac is in Safe Mode, you should see Safe Boot in the menu bar at the top right of the screen on the login window.
- To exit Safe Mode, restart your Mac without holding any keys during startup.
Update your macOS
Ensure your macOS is up-to-date:
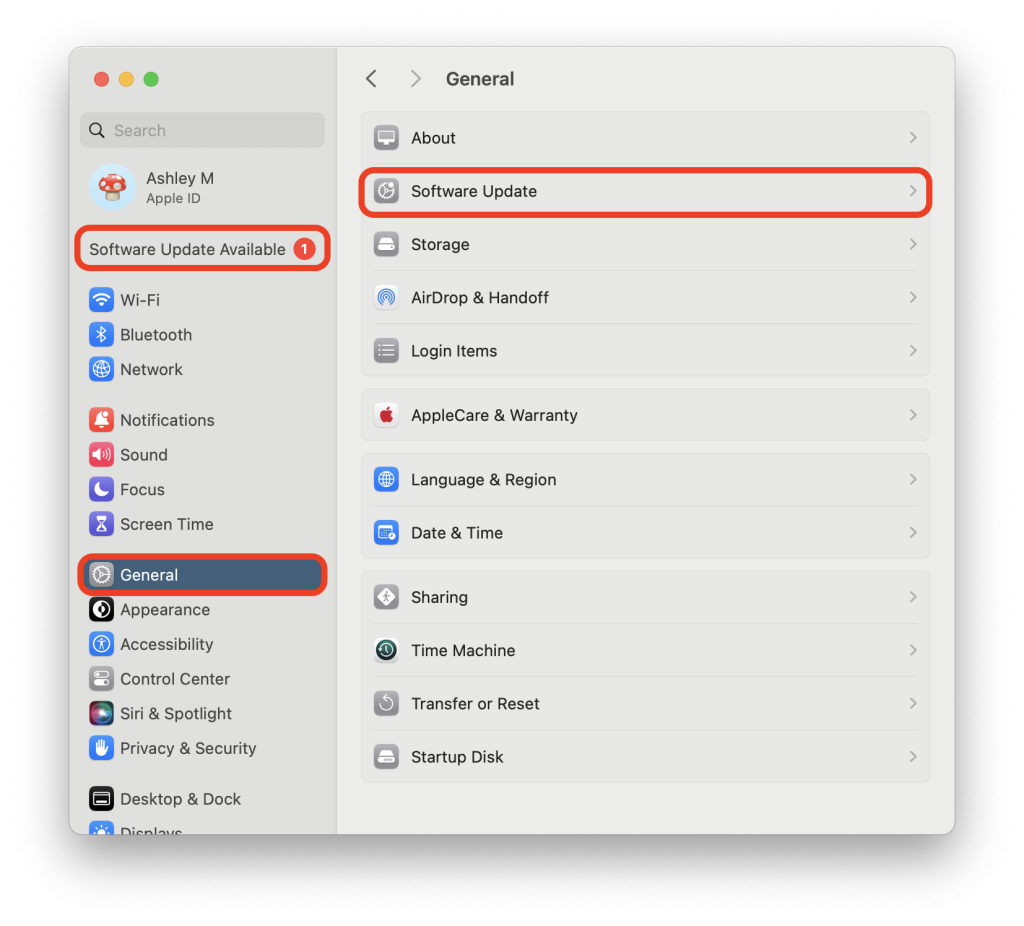
- Click on the Apple logo in the top left corner of your screen, then select System Settings.
- In System Settings, select General and then select Software Update.
- In System Preferences (older macOS), directly select Software Update.
- You may also see a Software Update Available message on the left menu bar.
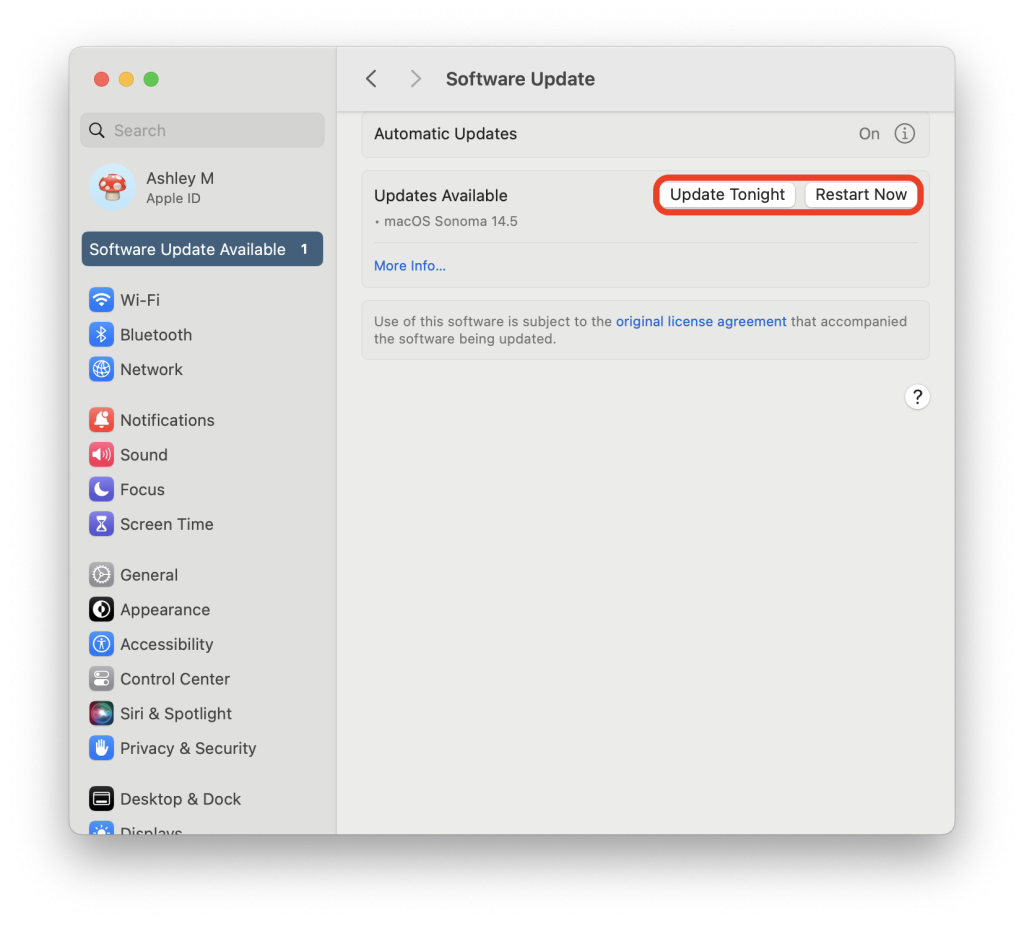
- Your Mac will automatically check for updates. If an update is available, it will be listed here.
- Click Update Now or Upgrade Now if a new version of macOS is available.
- Follow the on-screen instructions to complete the installation. You may be asked to enter your password before the installation begins.
- After the update is installed, you will be required to restart your Mac.
By following these steps, you can ensure your Mac menu bar stays in place. Not to mention, keeping your Mac updated and well-maintained will provide a smoother, more user-friendly experience.
If you notice that your Mac menu bar is still missing after following these steps, we recommend reaching out to Apple support or visiting an Apple Store for further guidance.
Turn your Mac or iPad into a wireless second display
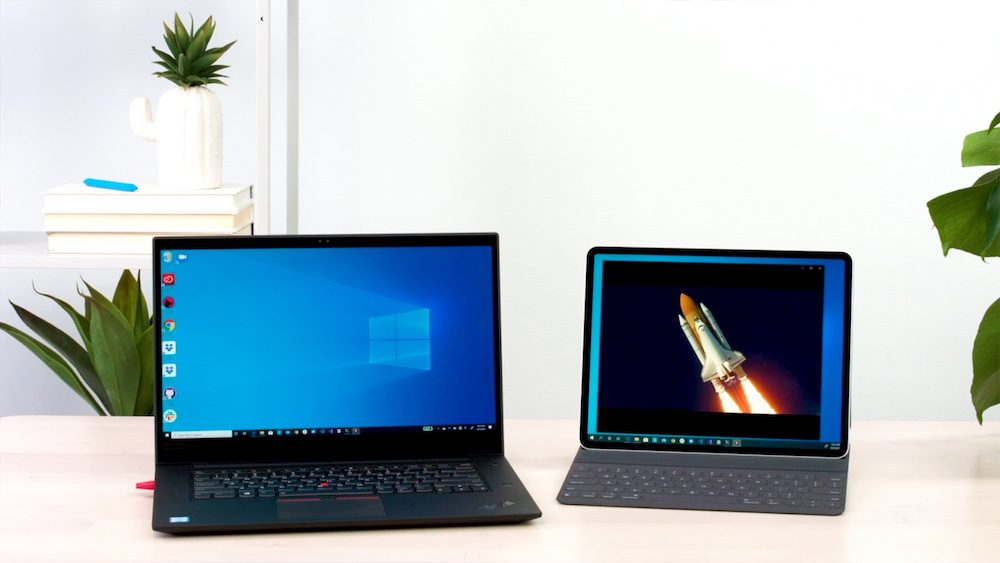
Mix and match devices for a seamless workspace:
- Computer-to-iPad: Turn your iPad into a second display – works with Mac and PC. Luna harnesses the power of your desktop and extends your workspace onto a touchable device.
- Computer-to-Mac: Use any Mac as a second display for your Mac or PC. It also works on older Mac models (use your iMac as a monitor!)
- Headless Mode: Use your Mac or iPad as the main display for Mac mini and Mac Pro.