Is the default pressure sensitivity of the Apple Pencil not working for your drawing style? Don’t sweat it! Creatives shouldn’t have to sacrifice work output quality for a tool — that’s why we make tools that bend to your will.
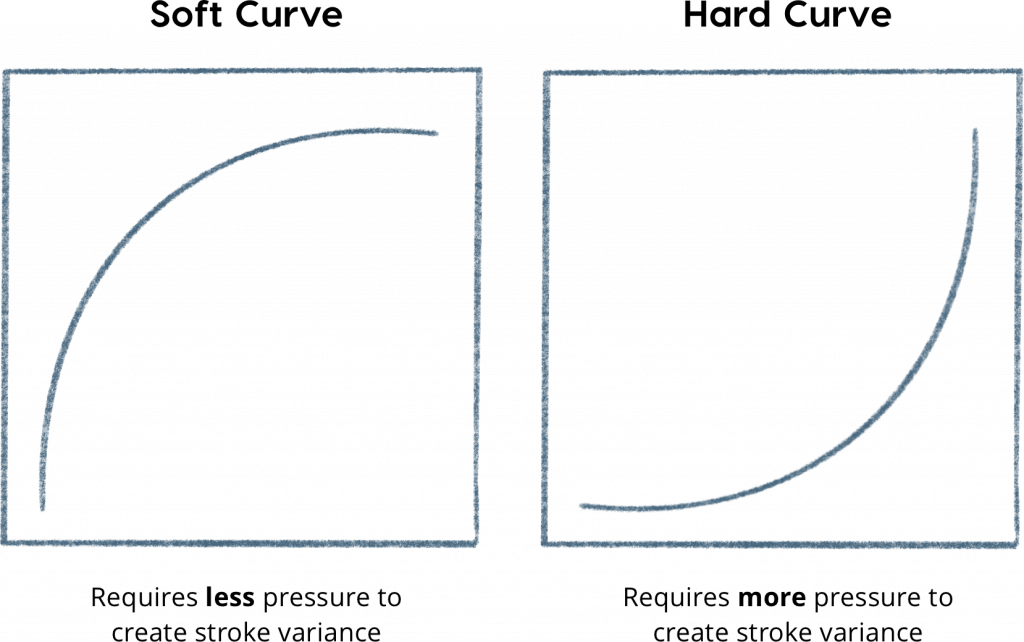
Soft vs. hard pressure curves
Pressure curves compensate for how hard or softly you press down when drawing with your stylus. This pressure, as with traditional pens, determines how much “ink” comes out of your digital brush.
- Soft Pressure Curves: The sensitivity escalates quickly, and the Apple Pencil requires less pressure to create a variance between stroke width and to reach full opacity.
- Hard Pressure Curves: The sensitivity escalates slowly, and the Apple Pencil requires more pressure to create a variance between stroke width and to reach full opacity.
In Astropad Studio, you can choose between 3 pressure curve options: Hard, Soft, and Custom. If your drawing style doesn’t fit well with a hard or soft pressure curve, then you might want to design your own!
Not sure where to start? Get inspired by these artists’ favorite custom pressure settings!
How to customize your pressure curve in Astropad Studio

Designing your own custom pressure curve is easy. Launch Astropad Studio on your Mac and iPad and follow the steps below!
- Tap Pencil & Stroke in the Astropad Studio sidebar.
- Scroll down in the sidebar to the Pressure Curve settings. You’ll see three pressure curve options: Hard, Soft, and Custom.
- Select Custom.
- Tap anywhere on the red line to move and add pressure curve points (white circles). Adjust points by dragging with your finger or Apple Pencil. Tap on the points you wish to remove.
- Test your new custom pressure curve by drawing with varying pressure in your workspace. Watch the pressure curve to gauge your pressure input.
- Need to start over? Click Reset to Pencil native curve, located beneath your custom pressure curve.
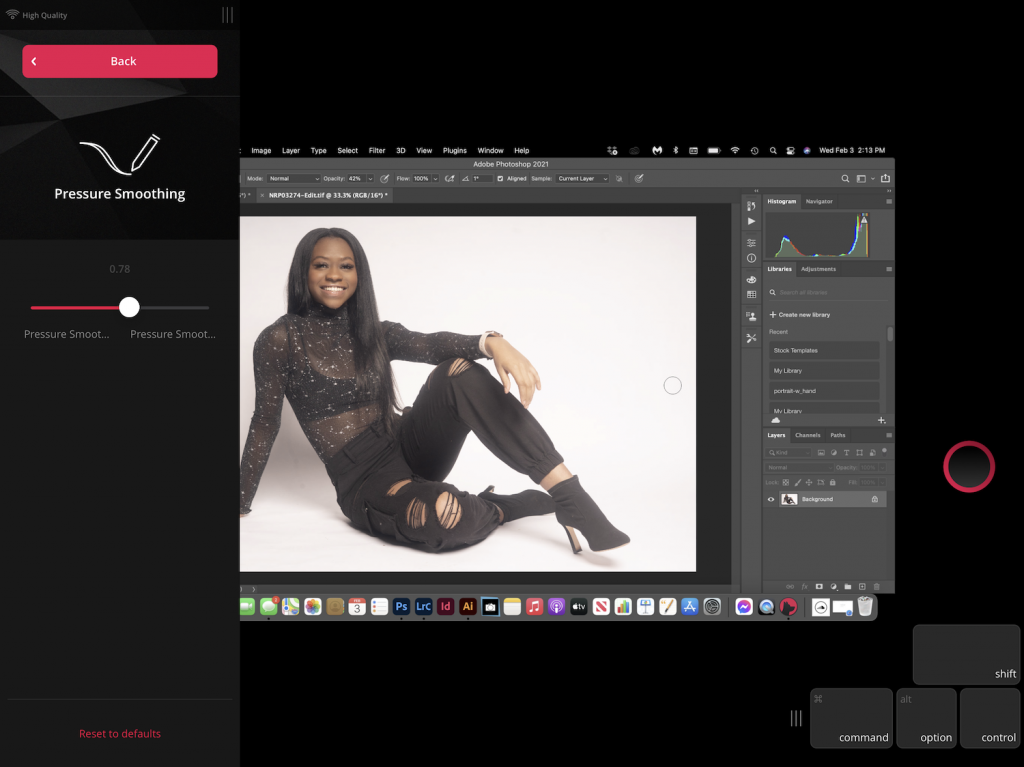
How to customize pressure smoothing
Astropad Studio also offers the flexibility to adjust pressure smoothing to fit your drawing style.
Pressure smoothing helps you adjust to the digital experience by adding a layer of ‘friction’ to your brush strokes, thereby creating smoother movements. Think of pressure smoothing as putting back in the natural friction you normally experience when drawing drawing on pen and paper.
By default, pressure smoothing is set to Enabled to provide a base level of smoothing that works across all desktop programs you use with Astropad Studio. With the Custom setting, you can increase or decrease the smoothing based on how much help you want smoothing your lines
To access this setting:
- Tap Pencil & Stroke in the Astropad Studio sidebar.
- Scroll down in the sidebar to the Pressure Smoothing settings. You’ll see three pressure smoothing options: Enabled, Disabled, and Custom.
- Select Custom.
- Slide the white dot along the line to increase or decrease pressure smoothing.
Try Astropad Studio free for 14 days
Complete workflow customization
- Per-app, unlimited shortcuts
- Custom pressure curves and pressure smoothing
- Magic Gestures (customizable Tap Gestures and Finger + Pencil combinations)
The flexibility to work anywhere
- Connects over WiFi or USB
- Full external keyboard support + on-screen keyboard
Built for the most demanding creative work
- Mirrors any Mac app
- Lag-free speeds at 60fps
- Crystal-clear image quality