Do you ever get your sketchbook out, or set up your whole workspace to draw, only to find yourself paralyzed by how to start? You sit there, staring at the blank canvas, twiddling your thumbs, racking your brain for ideas good enough to make the first mark.
So you open Pinterest or Instagram, desperately scrolling for inspiration looking for warm-up sketches. Until finally, you slump down out of hopelessness.
I’m here to help you out of that rut! We’ve got 12 digital art drawing exercises for your iPad to loosen up those fingers and warm up your imagination.
My digital art tool setup
- Astropad Studio app to use touch gesture Photoshop shortcuts on my iPad
- Luna Display dongle to extend Mac desktop onto iPad
- Adobe Photoshop app on macOS
- Procreate app
- Apple Pencil 2
- 12.9″ iPad Pro, 3rd gen (2018)
- 15″ MacBook Pro (2018)
- 5K LG monitor
Part 1: Take your drawing warm-ups back to the basics
These first few drawing warm-up exercises are all about developing control and muscle memory, so you can confidently master the basic shapes. These shapes will become the building blocks to draw more complex objects later on during your digital art drawing exercises.
#1: lines
Make ‘em parallel
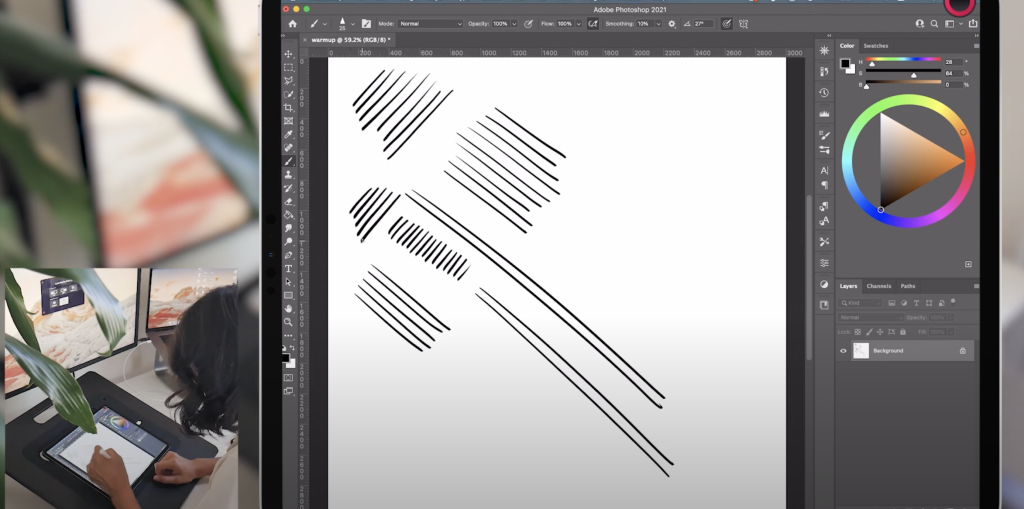
Okay, now I know that drawing lines probably seems like THE most boring drawing warm up exercise, but just hear me out. I challenge you to draw parallel lines of varying lengths from different angles — it’s not as easy as it seems (and it’s really satisfying when you get it right). Practice getting your parallel lines as close as you can! And try making them fast, as opposed to dragging the pen slowly.
Lock your wrist
During this exercise, I’m trying to use my whole arm as opposed to just bending at the wrist, especially when drawing the longer parallel lines (I didn’t do as great a job of it when I was drawing the smaller ones). Drawing from the shoulder will help you produce smoother lines because your arm movement range is much larger than that of just your wrist.
Note: During my digital art drawing exercises, I set my Photoshop Pencil Smoothing to 10% to compensate for the slippery iPad surface, and to mimic a toothy sketchbook page. If you’re using a Wacom tablet or an iPad screen protector that offers some textured resistance, you might not experience this slip ‘n slide feeling as much.
Drawing from the shoulder can produce smoother lines as opposed to drawing from the wrist.
#2: circles (& ellipses)
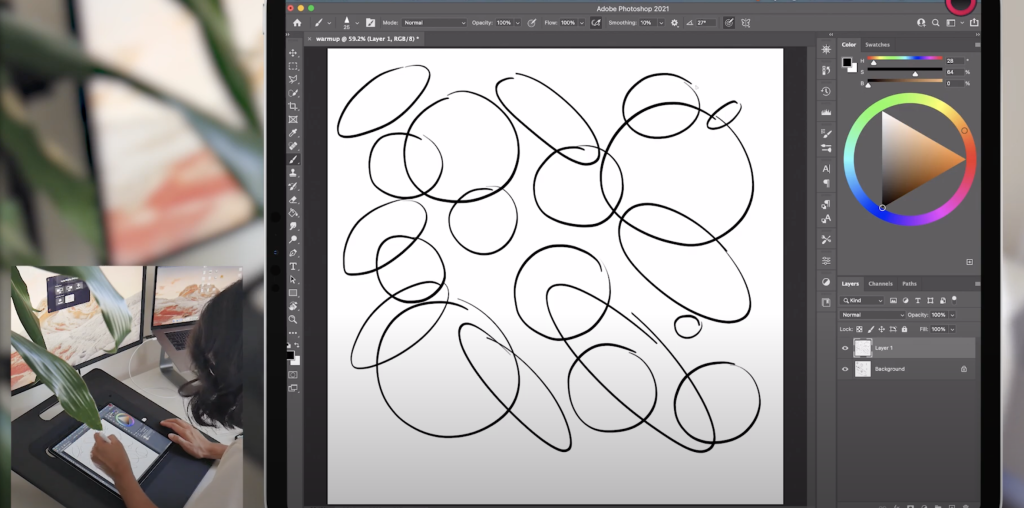
This one’s kind of a 2-in-1 digital art exercise because an ellipse is basically just a circle on a different plane, if you think about it…which you should! The ability to pivot objects in space in your mind’s eye will help when we eventually give these flat objects some volume.
Landing your helicopter
When I’m making these circles, I kind of ‘rev’ my arm in a circular motion — as if I’m a helicopter propeller preparing for landing. It helps me keep my whole arm in motion, so I don’t rely on my wrist to draw.
As with drawing straight lines, you tend to get a better effect when you keep your wrist locked and draw with the entire arm from the shoulder as opposed to from the wrist.
For some reason, I feel more comfortable drawing ellipses from left to right than from the opposite direction. You can always just rotate the canvas to draw shapes from the angle that feels most optimal to you. But it’s also good to, ya know, eat your vegetables, practice your weaknesses during your drawing warm ups, that whole spiel. 😉
As with straight lines, you tend to get a better effect when you keep your wrist locked and draw with the entire arm.
#3: rectangles
Last, but not most basic, we have rectangles. Whether you’re drawing lines, circles, or rectangles, picture turning them in space, and try drawing them at different angles and perspectives.

For example, try depicting a rectangle laying flat so that its plane faces skyward. Now try drawing that same rectangle as if the plane was facing a bit towards the left. Notice how two of the corners in each of the above scenarios might be closer together than the other two corners, or why some of the edges might appear to slant based on the perspective of the rectangle.
It might sound confusing in theory, but in practice, rotating objects in space even without perspective grids is a great skill to master. Perfecting these foundational elements now will help give us a jumping-off point to more difficult subject matter later.
https://astropad.com/tips-for-making-the-transition-from-traditional-drawing-to-digital/
Part 2: Getting more complex with your drawing warm-up exercises
In these next few drawing warm-up exercises, we’ll start to turn those basic shapes into little ‘legos’ with which we can create new ideas!
#4: 3D shapes
In the last drawing warm-up, we practiced drawing flat planes floating in space. Now let’s give them some volume. Try making rectangular prisms, spheres, cylinders, triangular prisms, and cones.
Being able to create dimension will help you when you need to start putting objects in perspective, or considering the different planes of the piece that aren’t immediately visible to the untrained eye, like the human body:
In retrospect, I probably could have saved myself some warm up time in the video and reused the shapes from the previous exercise, but instead I got a little extra practice by creating a whole new set of 2D shapes to turn three-dimensional. Whoops! 😅
#5: 3D cutouts
Practice ‘removing’ or cutting out pieces from 3D objects such as the ones we created in the last drawing exercise. Making 3D shapes is a crucial skill, but a lot of objects we see in real life are not going to fit into perfect categories, like rectangular prisms. They might have negative space — like a couch, for example.
So, we can use these 3D shapes as a reference point, and then carve away and mold them into more intricate ideas that start to resemble things we see in real life.
#6: compound objects
During your digital art drawing exercises, arrange shapes into compound objects. Try stacking or combining various shapes together from different viewpoints and angles. You can keep the ideas abstract or try constructing objects you see around you. For example, one of the compound objects I made resembles a human body.
If you think about it, our world is really just shapes cut out, rearranged, and then joined together. If you can learn to see these concepts in abstraction, it’ll become easier to analyze objects you see in real life in the same manner.
Part 3: Using your drawing warm-ups to start creating
Hopefully, you’re starting to feel a little more warmed up by now, a little less stiff. We’re getting to the fun part of the digital art drawing exercises!
#7: varying pencil pressure
For this warm-up exercise, I increased the pressure smoothing a bit, so as not to risk any jittery lines distracting me from the focus.
Try creating spirals and S-shapes / S-lines with alternating line weights. See if you can only add pressure on the downward strokes of squiggly lines.
Why it matters
Line variation is a super powerful skill that can be used to indicate:
- Weight
- Shadow
- Depth, object order
And can also:
- Add dynamism (interesting line variation vs. “boring” single-thickness lines)
- Keep things from looking flat
- Guide the viewer to interpret the main idea
Line variation in action
Here are some examples of how pencil pressure and line weight variation can bolster figure drawings.
In my first sketch of a hand, I’m using darker and thicker lines to indicate the heaviness of the palm. I tapered the line where the wrist and palm connect to express that the palm is overlapping in front of the wrist, which gives the hand a little more depth, as opposed to drawing the connection point with a thick line all the way through
The thicker lines also indicate that the palm and wrist are in shadow.
I used thinner lines to show that the fingers are lightly dangling and are not as weighty as other parts of the hand, and to imply which parts of the fingers are touched by the light source.
I sketched a few more limbs to further show how line variation can simultaneously illustrate light and shadow, dynamism, and weight distribution.
If we were to only use the same line thickness for the entire outline and the inner details, it would either get kind of monotonous, or it’d be difficult to tell the different features of the body parts apart.
Our job as the artist is to guide the viewer’s eye through the piece with intentional line work, rather than asking them to wade through a forest of identical lines to see the main idea.
Line variation creates a clearer message, so the viewer doesn’t have to wade through a forest of identical lines to see the main idea.
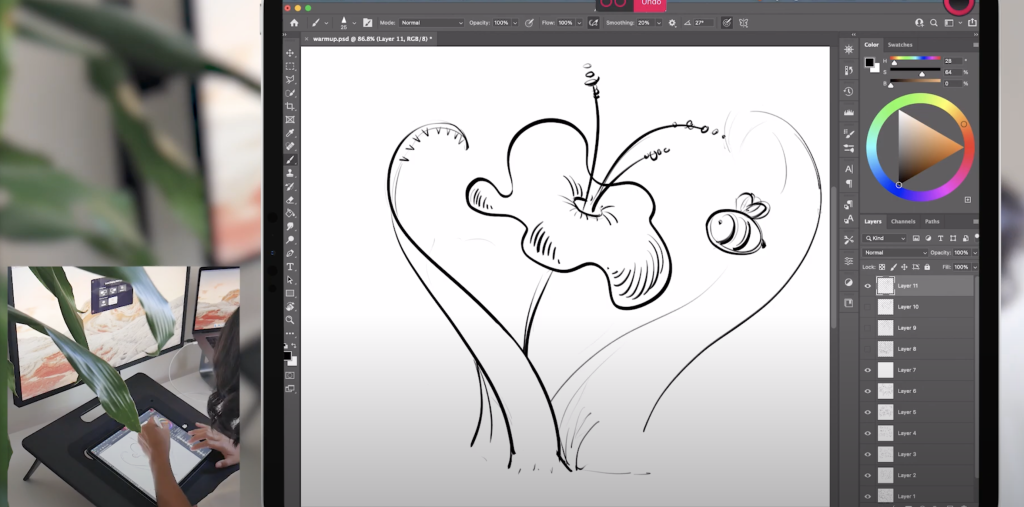
#8: paint blobs & try to make something out of it
I ended up trying out this drawing warm up exercise in a couple different ways. One was a lines-only approach, and the other was similar to cloud-gazing.
Lines only
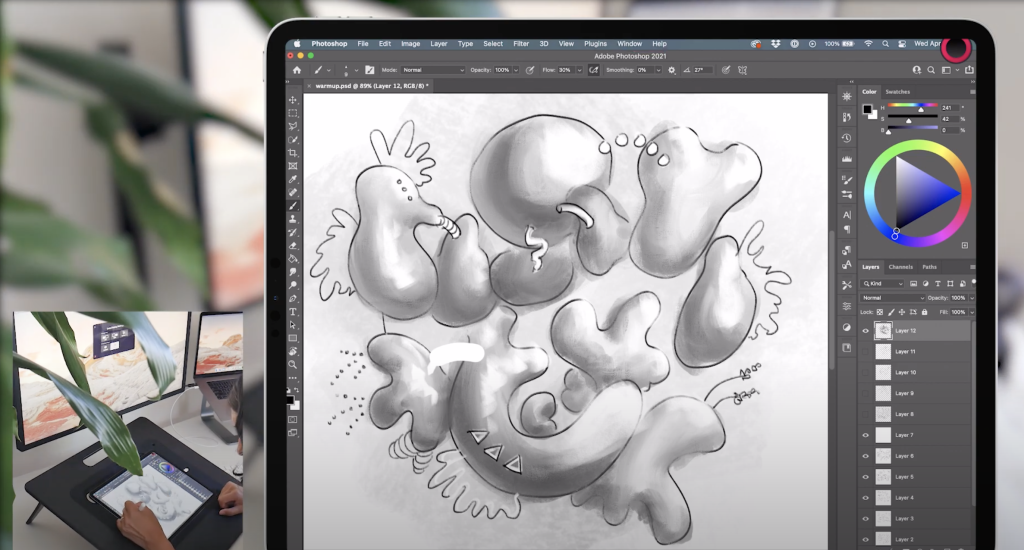
The first warm-up exercise was just lines only. I started with one blob, and randomly began adding lines to it to give it some dimension. Then I thought, that kind of looks like a flower!
So I went with that and drew a bee coming to pollinate the flower. I started to add a stem and some big leaves, which made me think that the flower could be a lure, like a Venus fly trap, but for bees…
I don’t hate bees, so I don’t know why my mind took this route, but I added teeth to the leaves, so if the bee gets too close, it will trigger the trap and the leaves will chomp down on the bee.
Cloud gazing
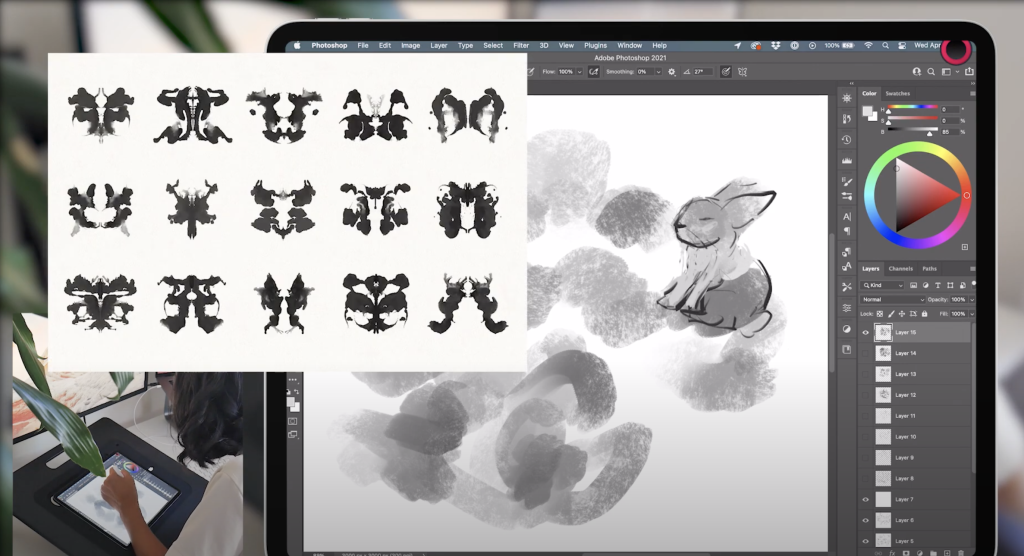
I also did another blob warm-up exercise that I think is pretty common – where you just paint splotches on a canvas and try to see what pops out at you, kind of like a Rorschach test or cloud gazing.
As I was still painting the blobs, I was already seeing images in the amorphous forms, and these are what resulted from it: a little rabbit and a baby dragon!
#9: paint blobs & keep it blobby
That’s a real term right? Anyway, this is a warm up exercise in going with the flow, and learning to generate something when you don’t have anything in mind
I picked up this type of “meditative” doodling from Tim Gula, featured on Proko’s youtube channel. In this activity that he calls “automatic drawing”, you can learn to ease your mind and improve shape design.
For some reason, this method was really revolutionary to me – a whole new way to look at doodling to loosen the mind. I ended up doing the activity a few times, and a bit differently from how Tim demonstrates in his video, but I think the main meditative idea is the same.
There’s no right or wrong way
I didn’t like the first one I did as much, but I just kept going with it to see where it would take me.
I ended up including it in the video and blog post because I felt like it was important for you to see that there is no wrong or bad way to do these drawing warm up exercises, even if you’re not crazy about the results.
Give yourself the space and compassion to experiment!
Take 2: less “Undo”
The second time I did this exercise, I focused less on lighting the forms and kept it a bit simpler and cloudier — and I think I enjoyed the process a bit more.
I also noticed that I didn’t second-guess myself as much the second time around, nor did I feel the need to press Undo much at all: just content to ride the creative doodle wave.
#10: blind contour drawing
This drawing exercise just really gets me out of my own head and helps me let go of the idea that everything always has to be perfect
It was especially useful when I was starting a new sketchbook and was really nervous about ruining the first few pages with something awful.
Starting with something that was already going to be imperfect by nature took all of the pressure away.
It’s totally fine to do a little bit of peeking when you’re doing this, just to double-check your hand placement and make sure your Picasso faces are still actually ending up on the canvas and in the same general region.
You’ll see examples here of both complete blind contour and some sneak peeks, but for the most part, I try not to glance at the canvas and just concentrate on observing the reference, trying to interpret the shapes that I’m seeing.
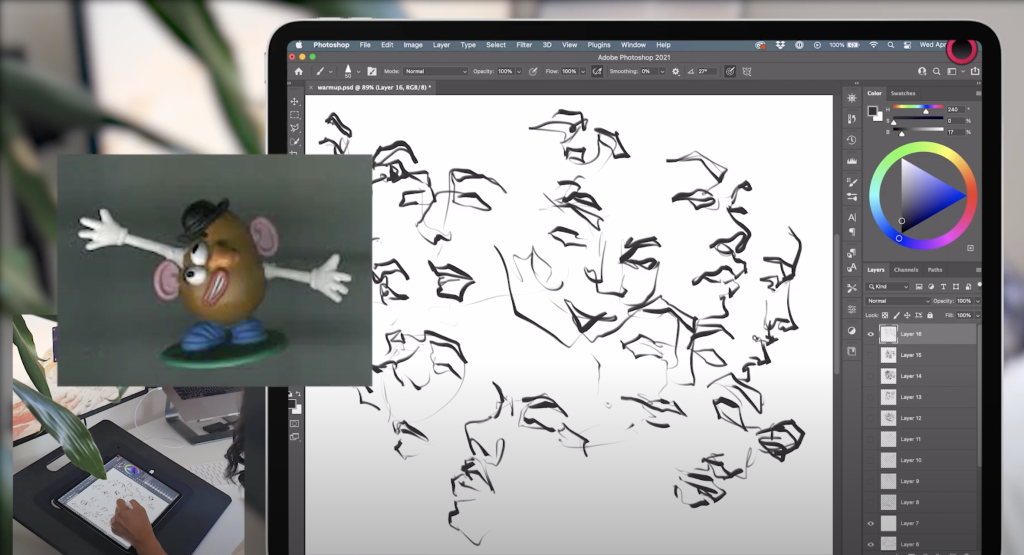
I think this exercise is really great because you’re forced to focus less on getting an exact likeness to the model, and more on putting down intentional or confident marks — which gives the drawings more life, even if they come out a bit shaped like Mr. Potato Head ;P
Starting with purposely imperfect drawings takes a lot of the pressure off.
#11: draw your forte
For me, that’s portraits and faces. They’re something I love to practice all the time. (I hope I didn’t jinx myself for these to turn out badly!)
So, hopefully, by now, you’ve started to warm up a bit and you’re ready to start drawing for real! Well, not that any of the other exercises weren’t real, but you get what I’m saying!
Once I’m feeling warmed up, I tend to start in my comfort zone, which can be good or bad depending on how you look at it… If the drawings turn out bad, then it can be disappointing to not meet my usual standard, but if it’s good, then everybody’s happy! Luckily, today was a decent day!

I just quickly threw paint down on the canvas and tried to only spend a few minutes on each portrait to get the main idea across. We’re going for quick finish, not perfection here. Remember, we’re just trying to get into a rhythm, not paint fully finished pieces just yet.
Notice that I’m using circles, there are straight lines and spheres involved, and I’m varying my line weight… so you can see we’re really starting to implement a lot of the things that we practiced earlier 😏
We’re still trying to get into a rhythm, not necessarily to paint fully finished pieces yet.
#12: draw your weakness
Not like, “Your weakness is that you’ve got trouble staying organized, so draw a tidy room.” If the previous warm up exercise was about drawing something you’re more confident drawing, then this exercise is meant to focus on subject matter you’re not as familiar with.
Here, I pulled from a large album of pictures of my cat, Mike, and also used a few cat poses from Pinterest for reference.
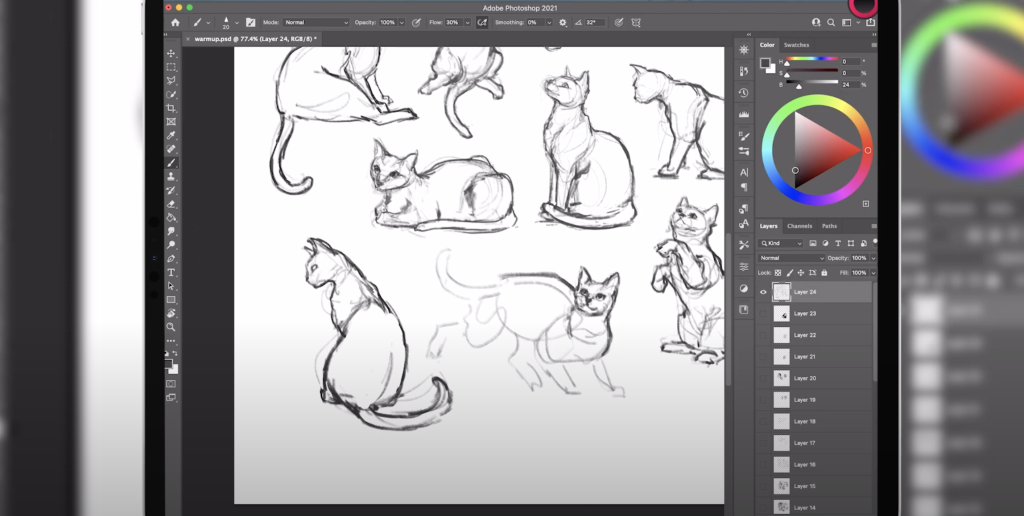
I’m not super well-versed in cat or animal anatomy, but I feel like I stare at Mike so often that I seem to have absorbed some understanding of his mechanics solely from constant observation, so these turned out a little better than I anticipated. I was pleasantly surprised!
The very last kitty, however, put up a bit of a fight — you can tell I really struggled with the pose — but it wasn’t even a picture of Mike, so… 🤷🏻♀️😜
Just have fun
So there you have it! You don’t need to do all 12 drawing warm ups; these are just some exercises to get you started. So pick which ones call out to you, and have fun with it.
Your skill level will probably determine how much time you feel like you need to spend on each activity. Of course, the more advanced you are and the more often you draw, the less time you need to spend on many of these exercises because you’re likely regularly incorporating these ideas into your drawings and getting the practice there — just like you saw when I was doing the head sketches.
It’s just a warm up 🙂
At the end of the day, these drawing practice exercises are truly about warming up your imagination so that you can feel confident creating!
The results don’t need to be pretty; the goal is to get comfortable in your skin before you start drawing, so give yourself plenty of space to play, and make mistakes, and grow!
If you try these warm-up activities, tag us on Instagram @astropadco!
Start your 14-day FREE trial when you sign up for Astropad Studio
Ready to level up your creative workflow?
Astropad Studio turns your iPad into a customizable drawing tablet. Draw directly into your favorite desktop apps like Photoshop, Illustrator, Clip Studio Paint — right on your iPad!