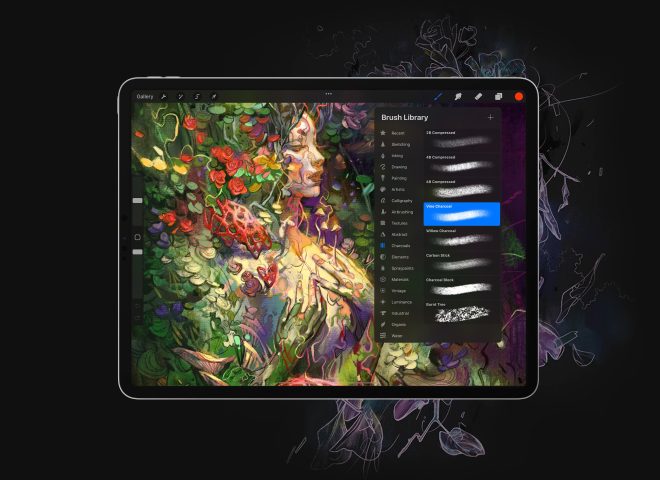
Clip Studio Paint is a great tool for illustration, manga, and comics publishing. With a wide variety of settings possibilities, it’s easy to fine-tune features for a better toolkit. We put together a mini-guide to help you get started with brush adjustments for use with Astropad.
Tablet settings
Clip Studio Paint has a way to accommodate for different tablets in use called, Tablet Settings.
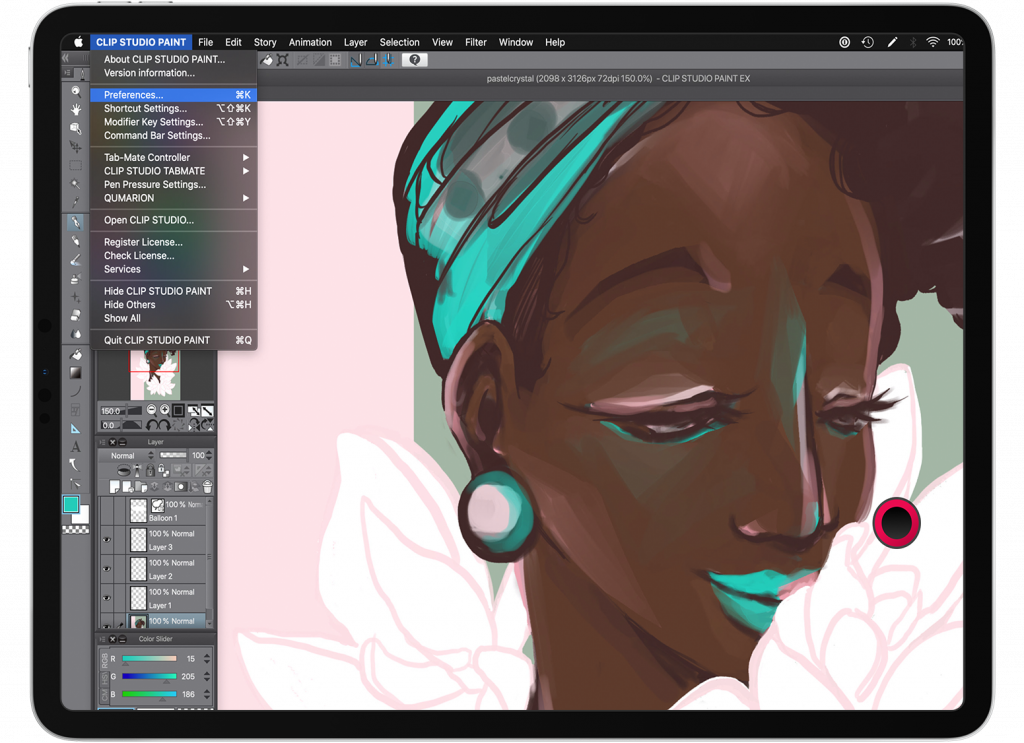
To access Tablet Settings, first go to Preferences.
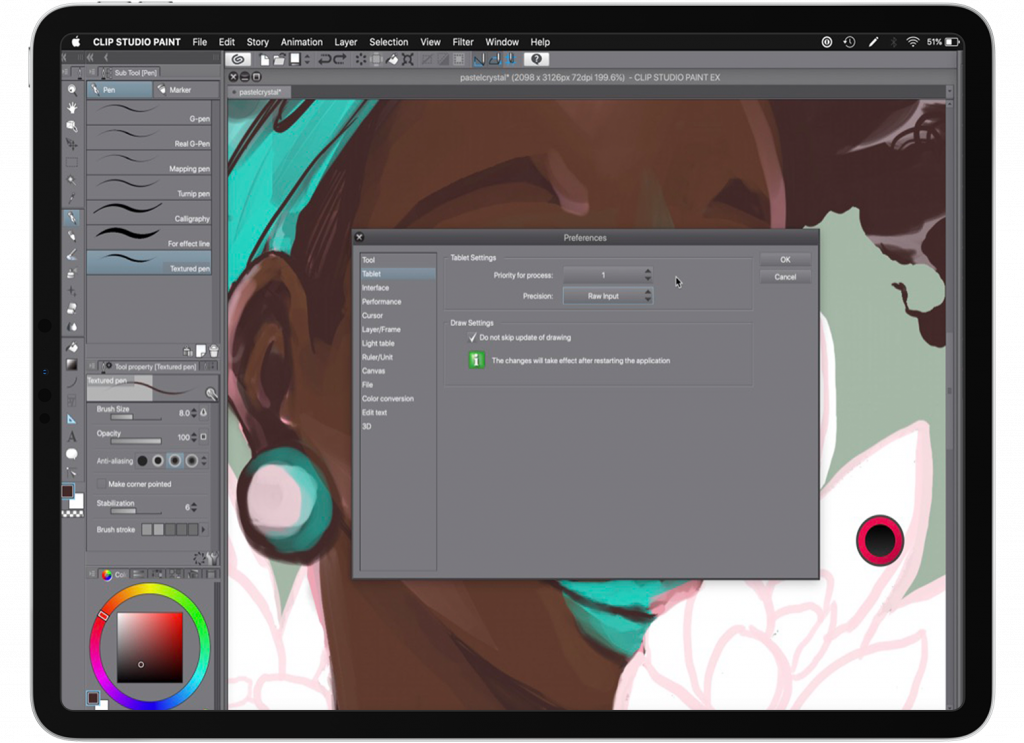
Select the Tablet tab to see options for setting the Priority for Process, and Precision. To get the best drawing performance with Astropad and Apple Pencil, we recommend Priority for Process be set to 1 and Precision set to the Raw Input option.
Brush settings
Like any tool, not every artist has the same needs. To better smooth out line quality and improve overall performance, brush tool properties can be customized.
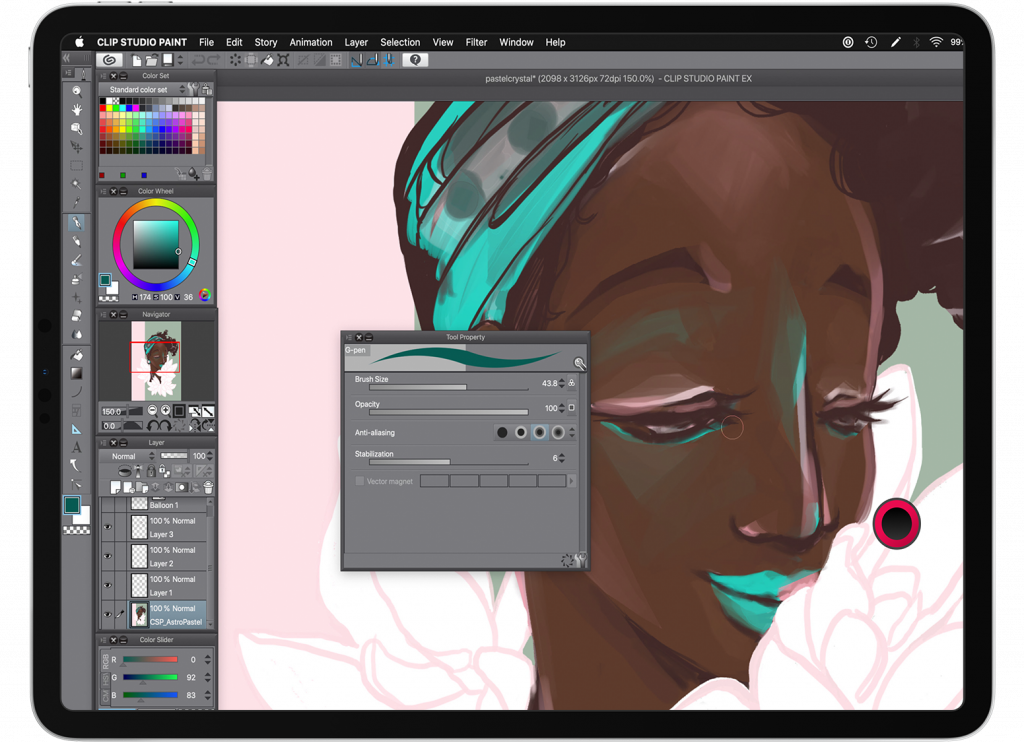
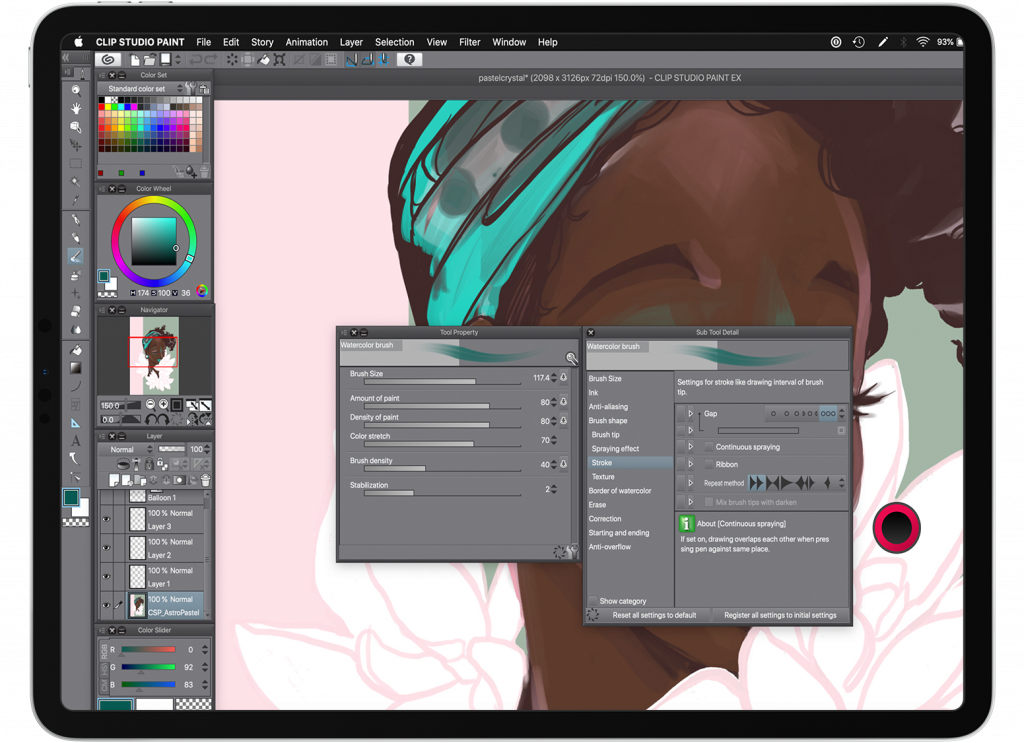
Some suggested settings when using the G-pen:
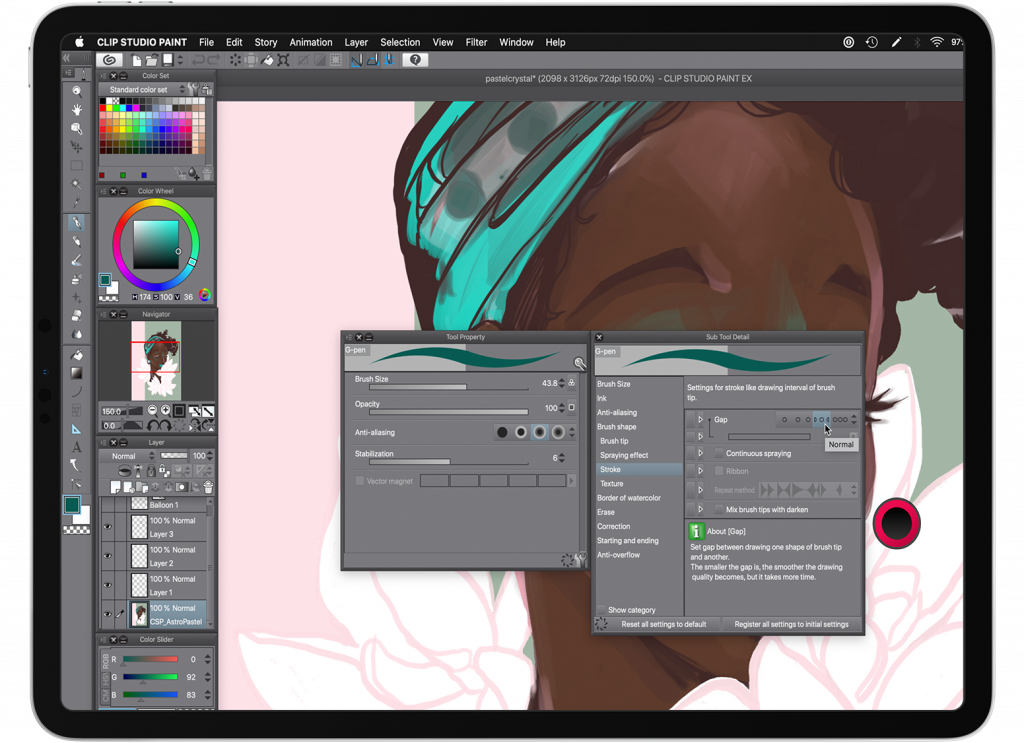
- Gap set to Narrow (3 dots together setting)
- Brush Stroke set to middle or maximum
- Stabilization settings vary by tool. For G-Pen, using stabilization settings closer to the minimum works better
To go into advance property settings for your brush tools, click the little wrench icon at the bottom right corner; this opens the Sub Tool Detail menu. In the Sub Tool Detail menu, you have access to further customization options and are given brief descriptions on the functionality of each setting.
Please note, these settings vary with different tools and brush types. For example, the Watery watercolor brush has different settings than the G-Pen — such as Amount of Paint — that will work just fine on the default settings.
It’s best to experiment with your brushes and see what works best for you!
Adjusting pen pressure
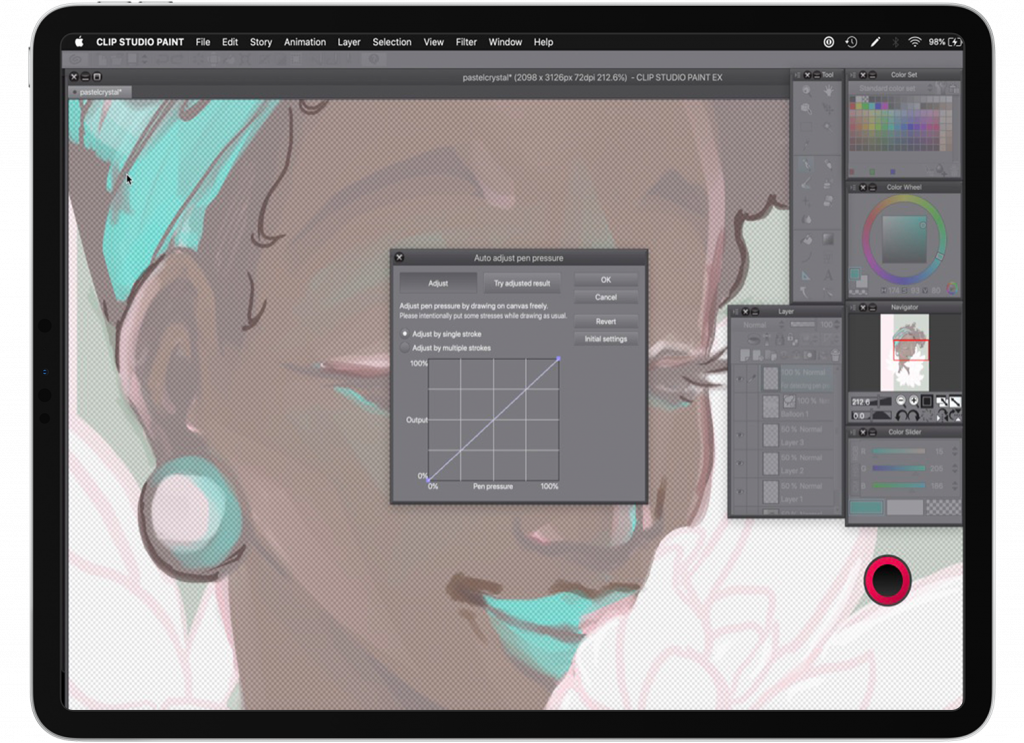
Clip Studio Paint has a feature that lets you change the pen pressure curve. It’s not necessary to adjust this, but it is worth checking out if, for example, you see some of your strokes aren’t showing up properly, or you draw with a lighter hand. The nice thing is that you can always reset the pressure curves back to the default curve.
To use this function, click Adjust and draw with different degrees of applied pressure on your iPad. This can be adjusted by drawing a single stroke or by making multiple lines. The Pressure Curve settings will automatically adjust based on this applied pressure range. Make sure to restart Clip Studio after completing this setting change.
If performance seems a little slow
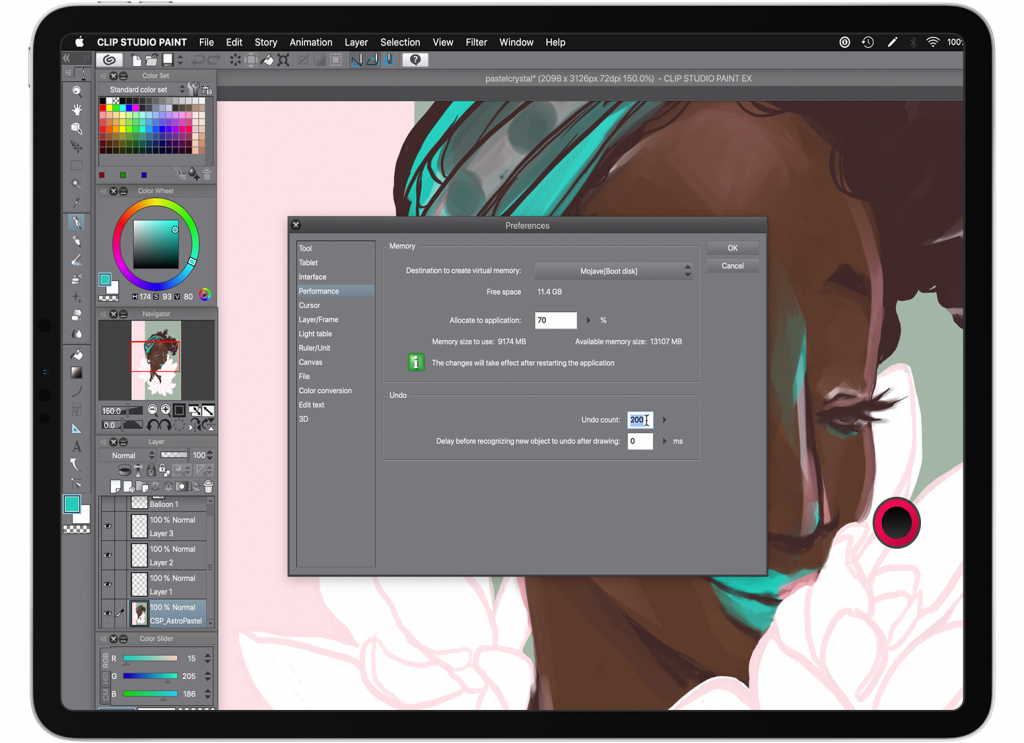
Along with changing the Tablet Setting, there’s another option that can help in the performance department: lowering the amount of Undo history. In Clip Studio Paint’s Preferences, select Performance, then lower the Undo Count number. We would recommend trying this if you’re experiencing any delays with use.
try astropad studio free for 14 days
Ready to level up your creative workflow?
Astropad Studio turns your iPad into a customizable drawing tablet. Draw directly into your favorite desktop apps like Photoshop, Illustrator, Clip Studio Paint — right on your iPad!

