Are you looking to get better brush strokes while drawing on your iPad?
Procreate offers many different options to customize your brush settings. From the smoothness of your stroke to the size of the texture, there are endless possibilities to adjust your stroke for your drawing style.
I’ll walk you through some of my favorite stroke settings for iPad. You can tinker with these settings to get the exact effect you’re looking for in your art!
Stabilize your stroke with ‘StreamLine’
If I’m feeling anxious or I’ve had too much coffee, my hands sometimes get shaky while drawing. That’s when I use Procreate’s StreamLine feature to back me up!
Some people avoid StreamLine because it’s too assistive. But on the days when I’m not drawing as effortlessly as I’d like to, StreamLine is an excellent feature to achieve smoother lines.
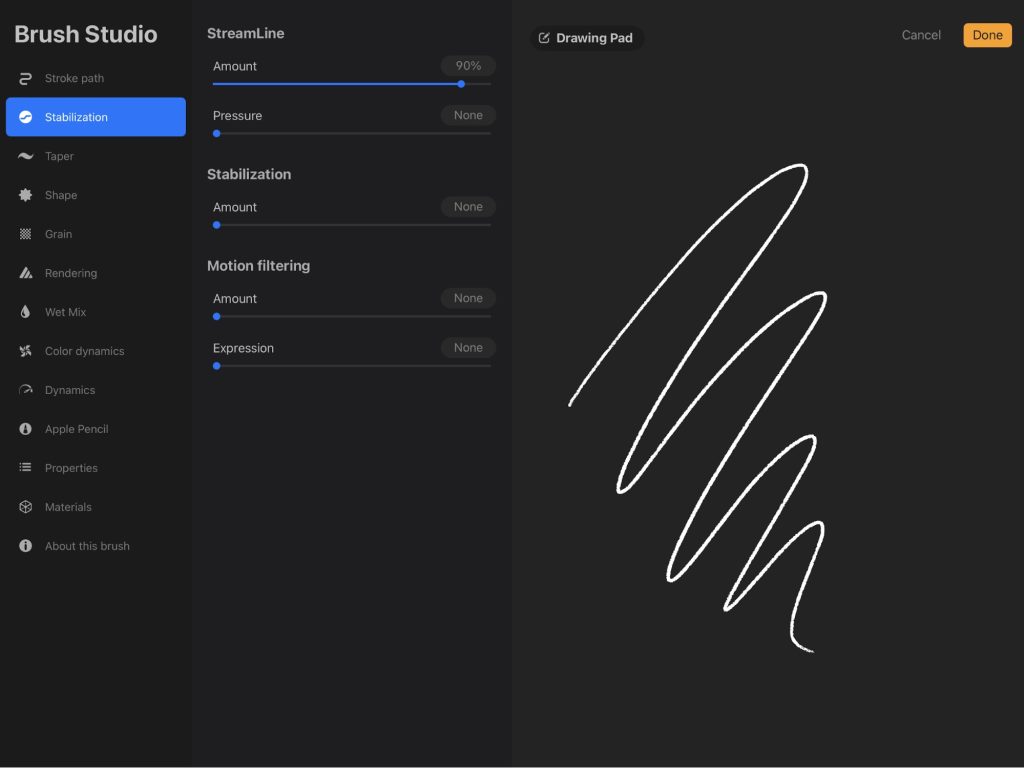
When I’m inking, I like to set StreamLine between 70% and 100%. The higher the pressure, the smoother your lines will be. In Brush Studio, you can use the Drawing Pad to preview how your stroke will look as you adjust it.
If you’re going for a more natural, hand-drawn look, I recommend setting StreamLine to a lower percentage to show more stroke variation.
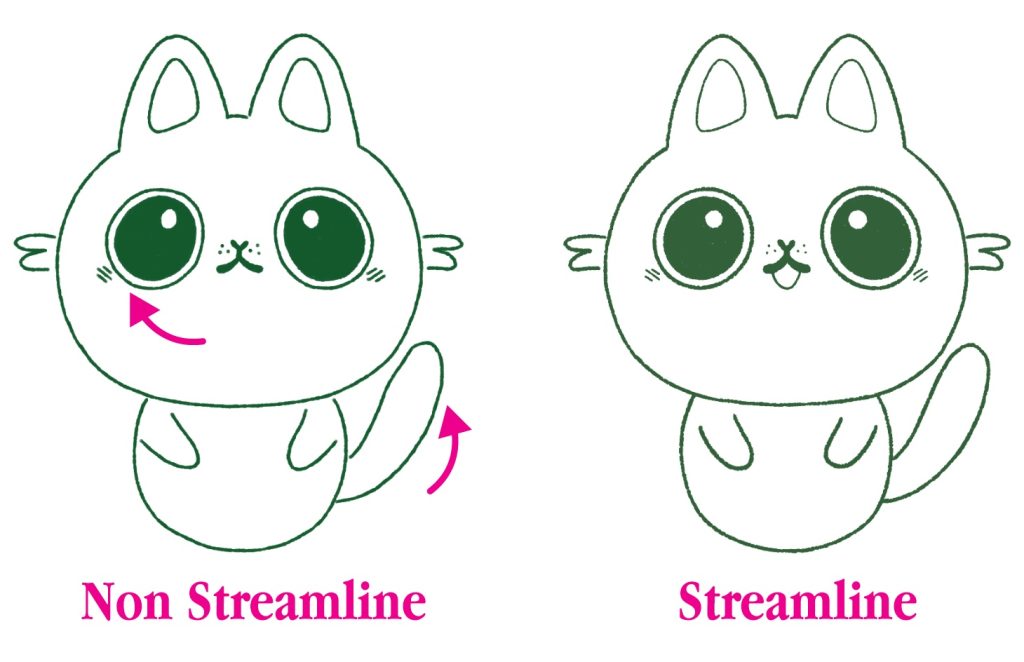
In the image below, you’ll see that the character on the left has eyes that are not quite as round as the one on the right.
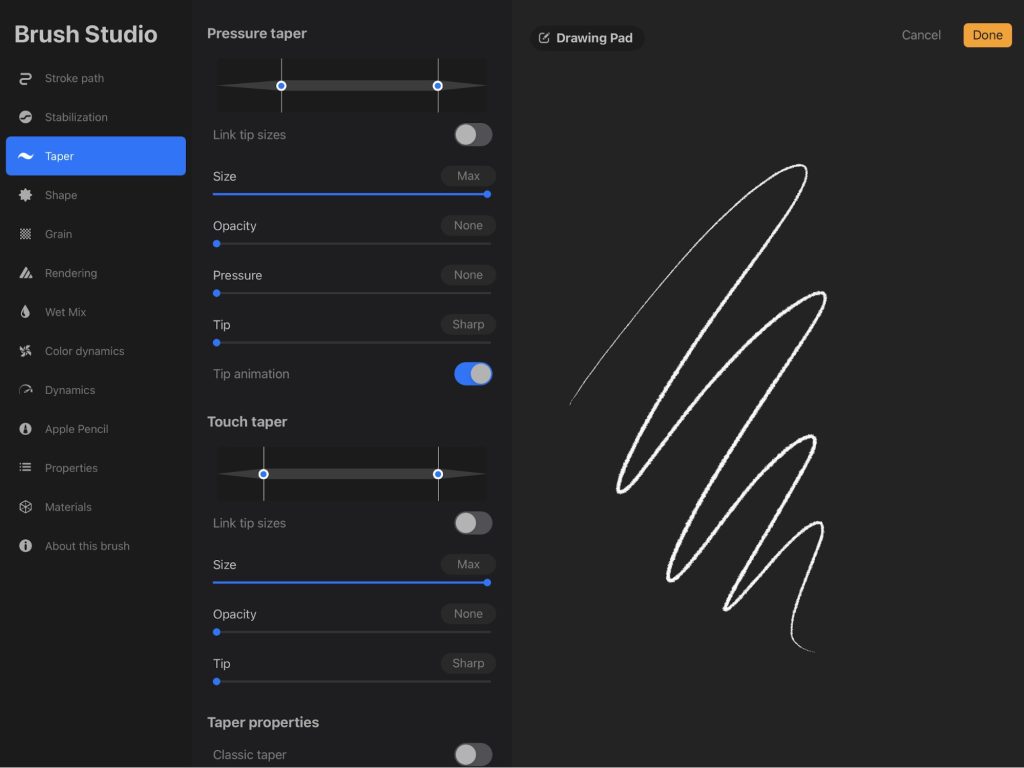
Create a natural look with line tapers
Recently I’ve been creating digital art that almost looks like traditional art. To get this look, I’ve been tinkering with tapered lines, which affect how uniform your stroke looks with pressure variation.
Some brushes already have tapering built in. But if you’re looking to have more control over your line widths, head to the Taper tab in Brush Studio.
To customize your taper length, move the points along the Pressure Taper slider. You can adjust the beginning and end of your line work.
For the more natural stroke look I’m going for, you can see what my taper settings look like below.
👉 Don’t lose your brush settings! When making edits on a brush, remember to duplicate the original brush first so you won’t lose it!
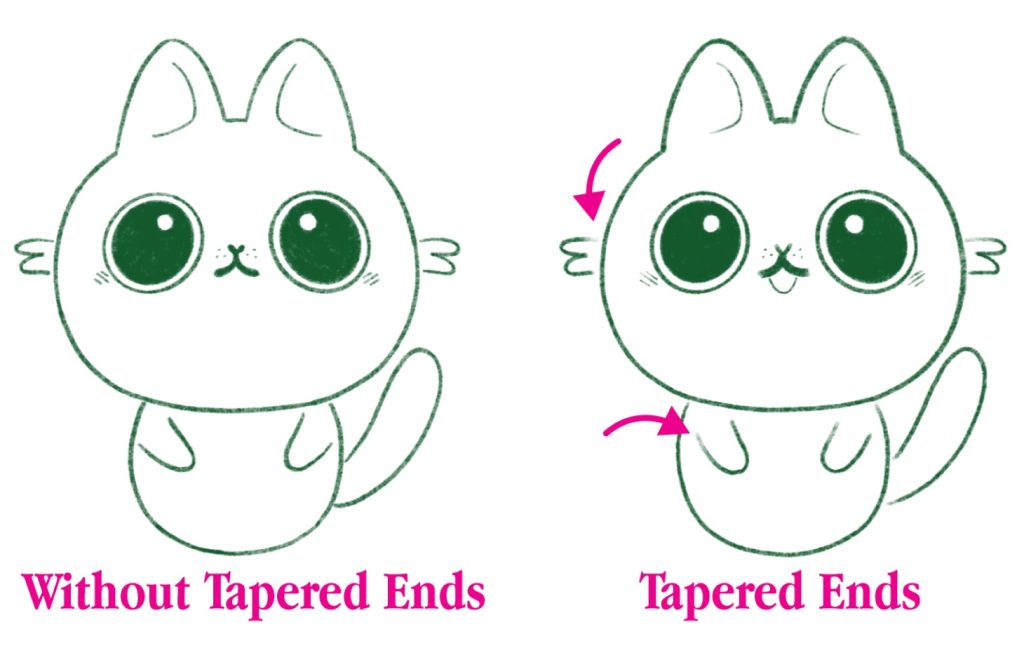
As you can see in my example below, the character with tapered ends has a more hand-drawn feel. The brush strokes have less opacity and are thinner at the end of the stroke.
👉 Pro Tip → When you alter a brush setting, the customizations only apply to that individual brush. If you are looking for a more global option, try the Pressure & Smoothing tab under Actions!
Set a universal pressure curve
I tend to be heavy-handed when I’m drawing, and I often find myself pressing down hard on the screen without even realizing it. I’ve worn out my Apple Pencil tips more often than I’d like to admit!
Thankfully, you can adjust your pressure curve in Procreate to accommodate your unique drawing style. To customize your universal pressure and smoothing settings, head over to Prefs > Pressure and Smoothing.
There are a lot of ways you can adjust this curve to fit your needs, depending on how you draw. It can be a bit intimidating to look at, but I will show you how to adjust it to suit your needs!
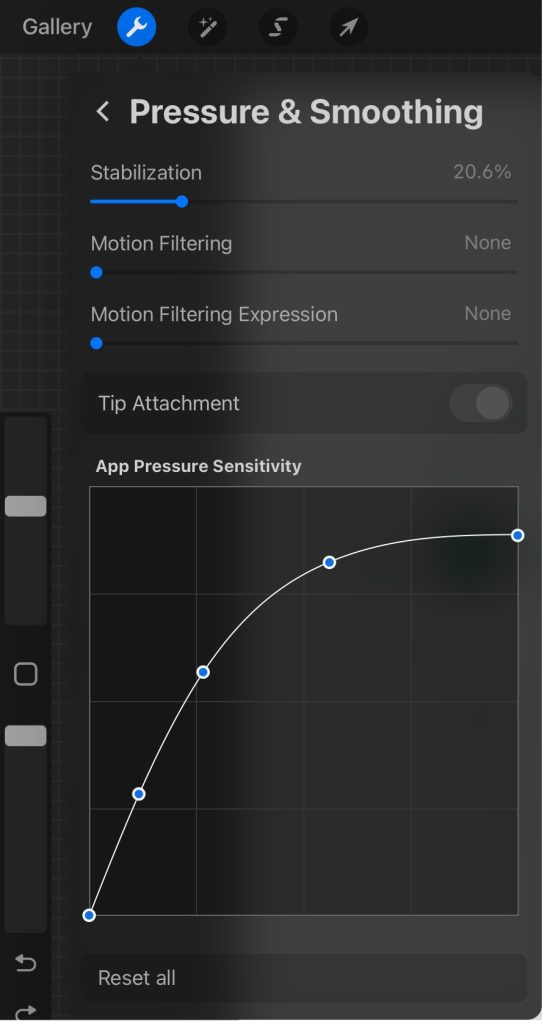
The graph above defines pressure. Play around with the points in the graph to find something that works best for you.
- Adjusting the curve to the left will result in your pencil responding with lighter pressure.
- Moving the curve to the right means you will have to press down harder on the pencil to get a thicker stroke.
👉 Not sure where to get started? Every artist has a unique pressure preference based on how they work. We asked three artists how they customize their pressure curves on iPad for different uses. → Best Custom Pressure Curves for Illustration and Retouching
- If you want to feel like you’re drawing on paper
- If you want your iPad to feel like a Wacom tablet
- If you’re doing detailed retouching and frequency separation
I hope you found these tips helpful! Now spend some time tinkering to get that perfect brush stroke you’re looking for. Enjoy!