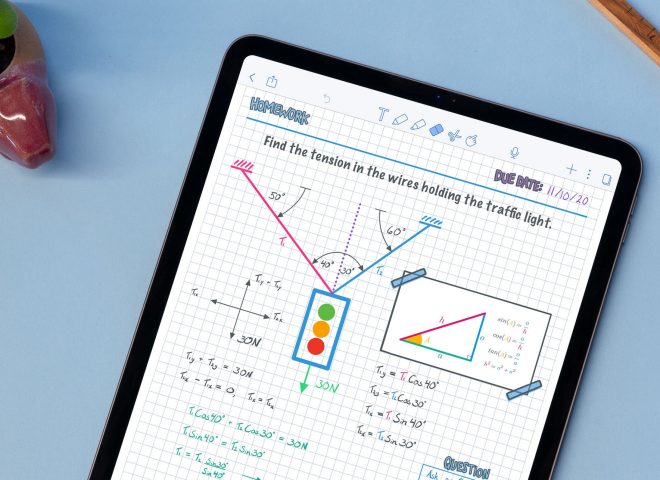
Blender has always been computer-centric and optimized for mouse and keyboard. But what if you could model and render scenes with the convenience of a touch-enabled tablet and the power of your PC or Mac?
With Astropad Studio, not only can you use Blender on your iPad while utilizing your computer’s processing power, but you can also speed up and simplify your modeling workflow!
To help you get started, we are putting together some tutorials to build your confidence using Blender on your iPad. This guide will focus on the basics of lighting in Blender using the Eevee rendering engine.
set up quick keys and shortcuts for blender on your ipad
Before we get into lighting our scene, we will want to make sure we have the relevant quick keys and shortcuts to streamline our workflow. If you’re new to using Blender on your iPad, check out our guide for setting up Quick Keys and gesture shortcuts in Astropad Studio:
Lighting in Cycles vs. Eevee
Lighting can differ greatly between the Eevee and Cycles rendering engines, and as such the settings for lighting under each type will be different. Cycles is a very powerful tool for rendering realistically lit scenes with very little limitation on the number of lights utilized, but with this power comes longer rendering times. Eevee can currently only support 128 active lights in a scene, but it can be more convenient for beginners or for animation due to the shorter render times. For this reason, we are going to keep this guide limited to Eevee.
Regardless of whether we are using Cycles or Eevee for rendering, we will have four different lights to choose from and customize for our scene, and they are referred to as “Lamps” in Blender.
Blender lamp types
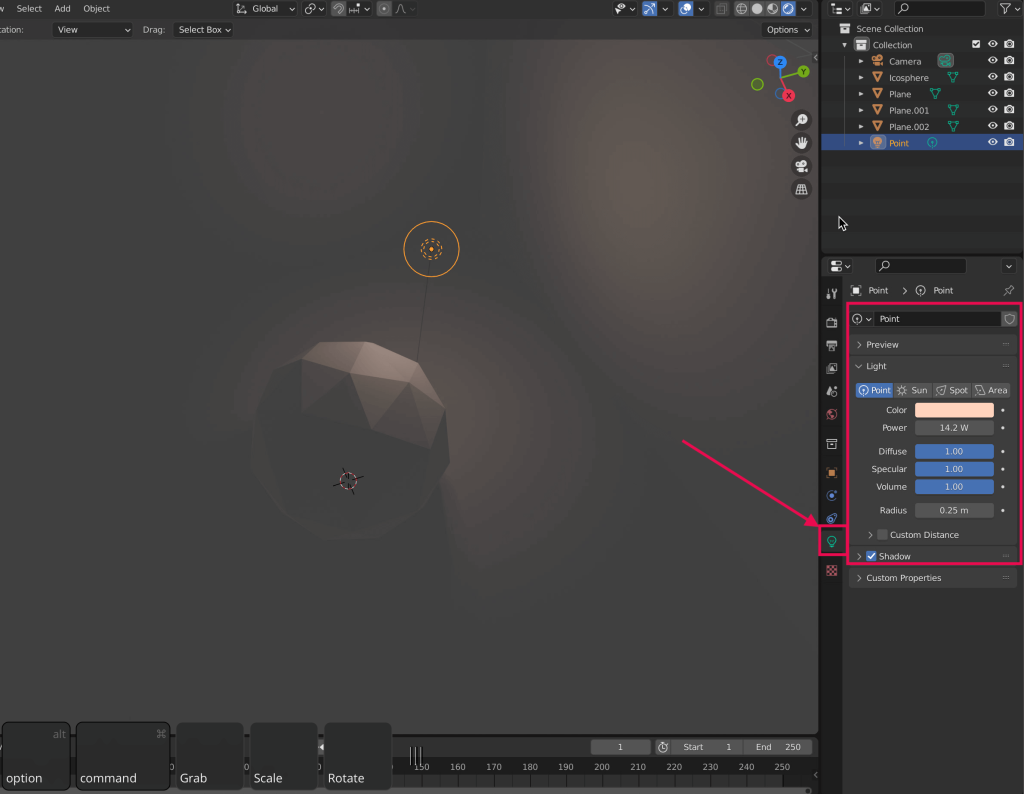
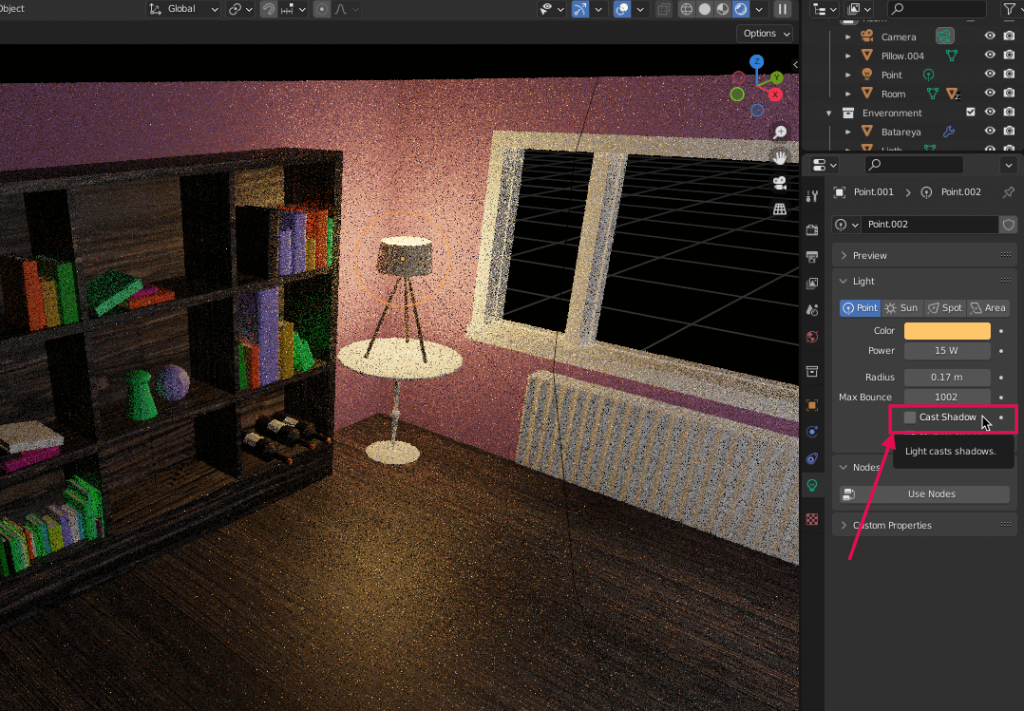
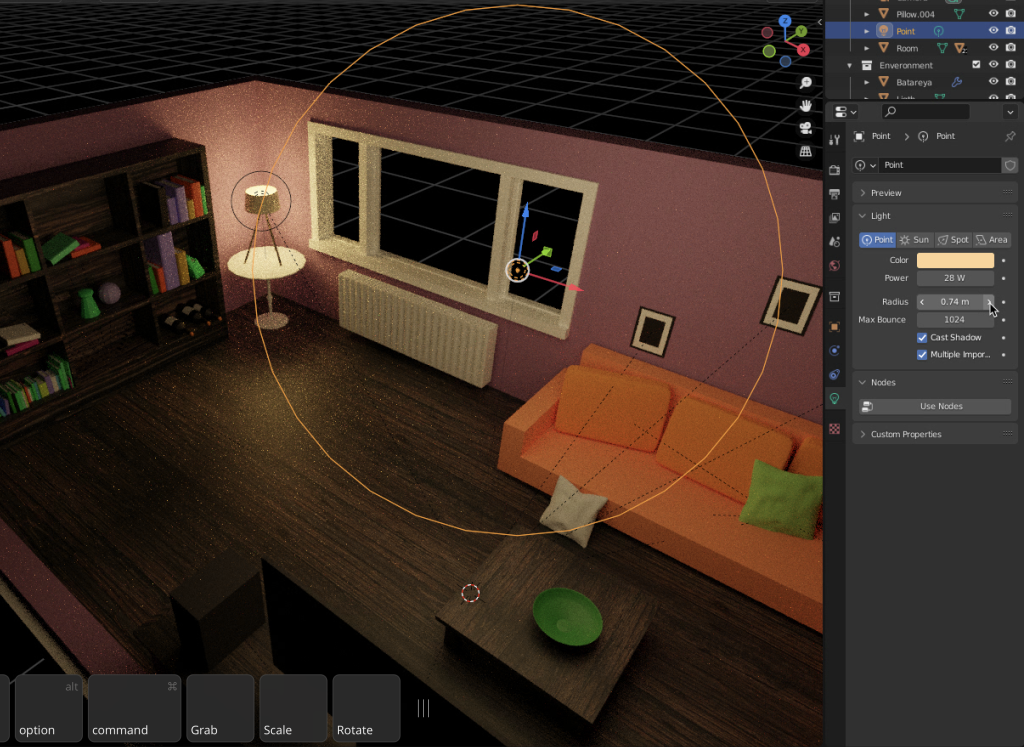
Point lamps – Point lamps are the most basic representation of how an average light source functions in real life. The light from point lamps starts at a single moveable point and diffuses outward in every direction. The strength of the light reduces the farther it travels from that single point, and this reduction is called “falloff”. To edit this lamp and any others you place in your scene, you can find the settings on the right side by clicking on the light bulb symbol. The main settings we would likely change on this lamp are the color, the amount of diffusion from the source, the radius of the light source, and whether it casts shadows.
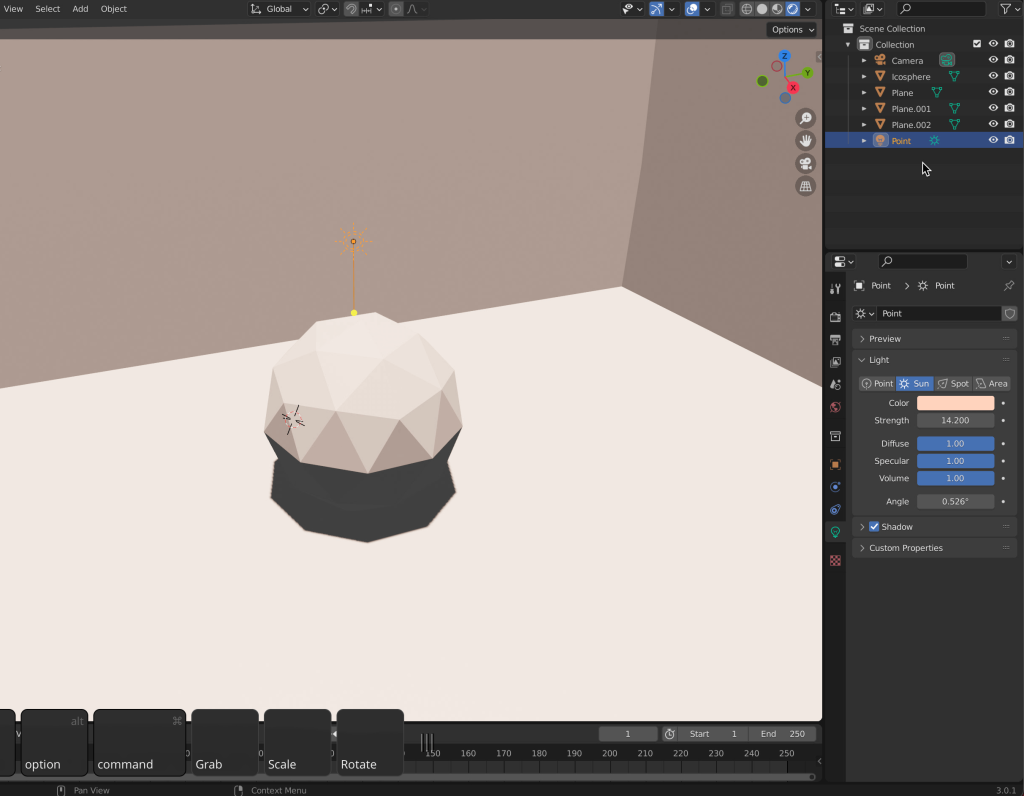
Sun lamps – Sun lamps, as their name implies, are meant to mimic the sun we see on Earth. The sun lamp’s falloff will be considered constant falloff since the real-life sun’s light is more or less consistent and not focused on any one point like a normal lamp would be. The common settings to adjust for the sun lamp are color, strength, and whether it casts shadows.
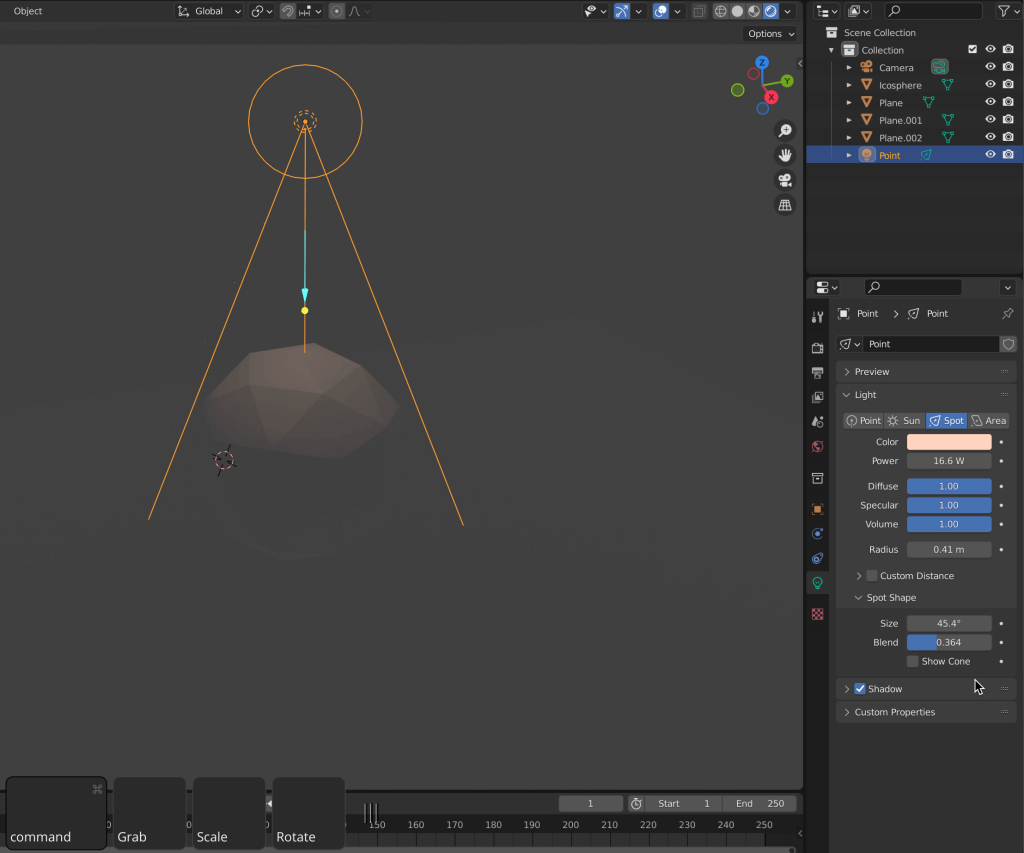
Spot lamps – Spot lamps simulate a spotlight and shine their light in a cone shape. The light slightly diffuses as it travels from the source but the falloff is not nearly as dramatic as what you would see with a point lamp. Not only can you edit the color for spot lamps, but you can adjust the diffusion, shadows, and size of the cone. If you aren’t sure what objects the spot lamp’s light is encompassing, you can select Show Cone under Spot Shape, and it will provide a translucent example of the cone’s shape that is not affected by diffusion.
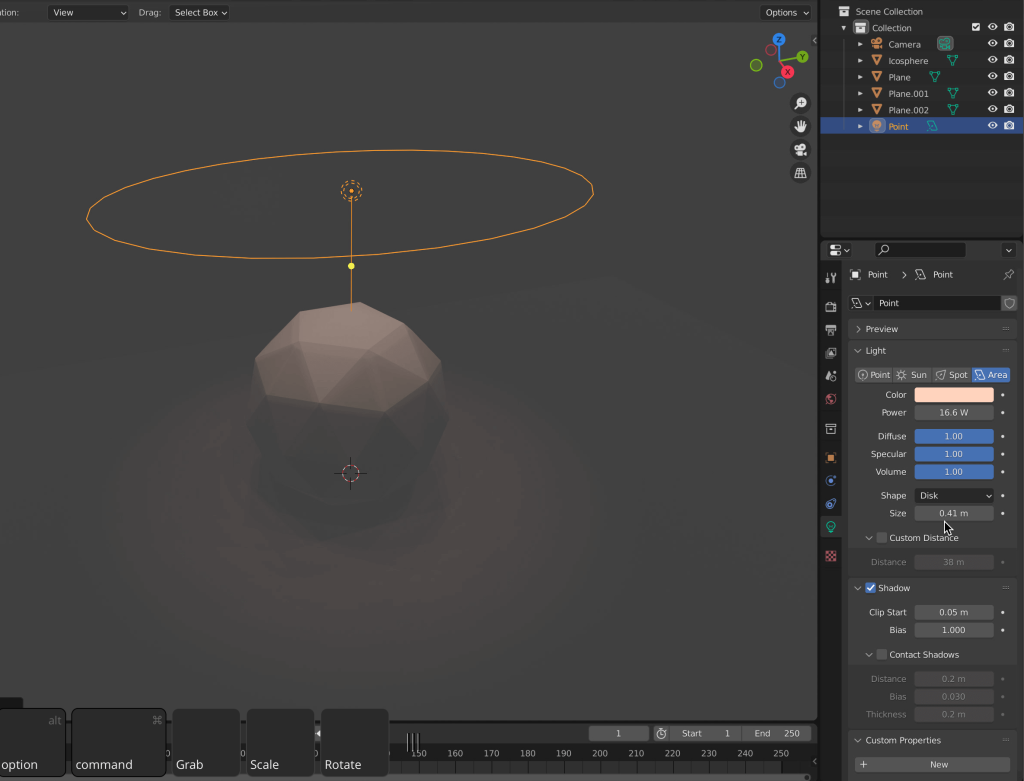
Area lamp – Area lamps emit their light from a plane much like the light diffusers you see in Photography. The light can be completely diffused from the light source (the default) or they can be set to limit their light solely to the shape of the plane you choose causing sharp edges to appear. There are a few different shapes to choose from with area lamps, and while I have a disk shape selected here, you can choose a rectangular, square, or circular area lamp as well.
What do we use for indoor lighting?
For your typical indoor scene, you will use point lamps, spot lamps, and potentially area lamps. It will depend on the mood you are trying to create with your lighting and the light sources you intend to have in your scene such as candles, lamps, and various other electronics. For strictly indoor lighting, a sun lamp is unnecessary; though you may have windows that could allow light from a sun lamp to shine in from outside your indoor scene if you choose.
Prep your scene
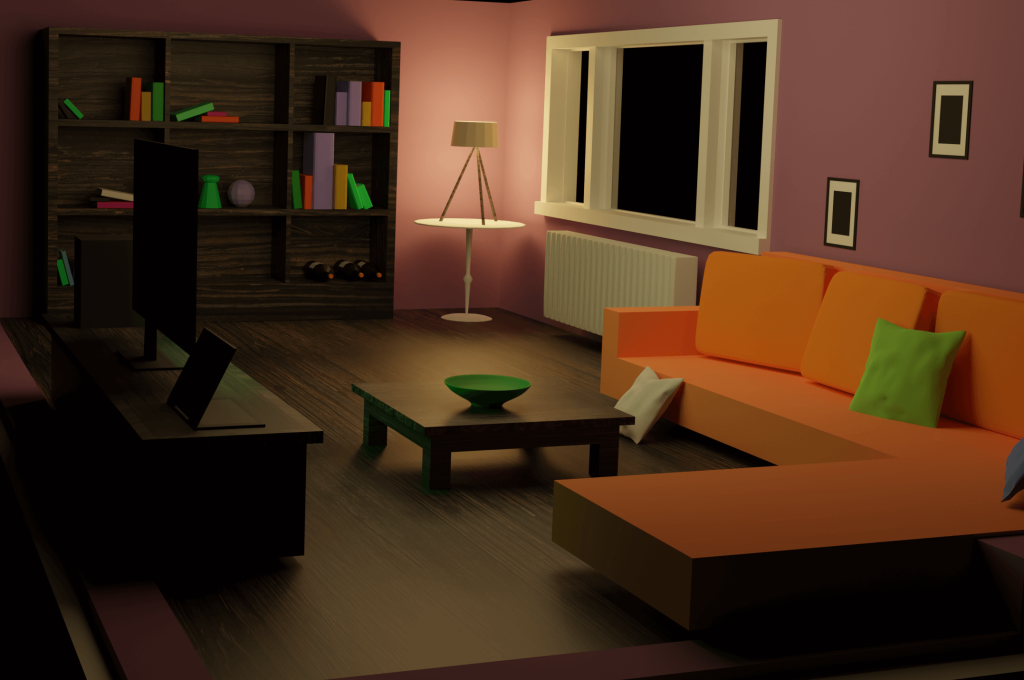
For a demonstration of how an indoor lamp would typically look and to give you an idea of the settings involved, I’m using a basic living room model that has been pre-built. If you would like some tips on modeling and texturing to create characters or a scene, you can find our other guides here.
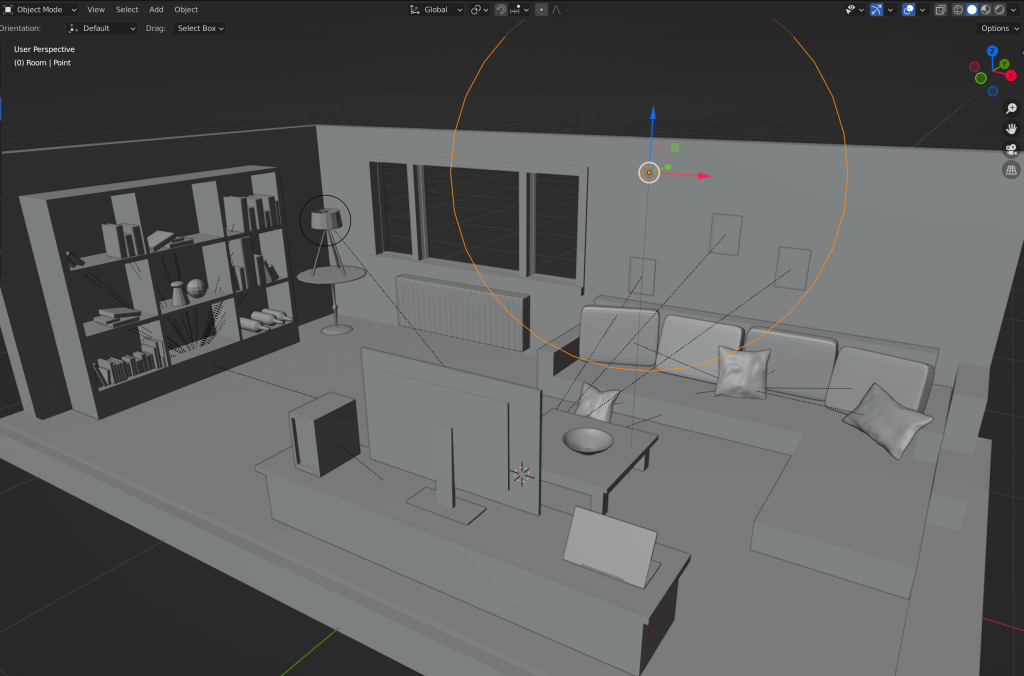
In this living room model, we have a lamp on a table and while we don’t technically have a ceiling modeled, we will also have a light source coming from what would be the ceiling for the sake of the render. We are mostly going to be focusing on the corner with the lamp.
How do we begin?
In our scene, we are mostly going to be focusing on point lamps. Typically lights within a home are small, relatively low wattage, and yellow-tinged to give it a cozy feel. Since we have a table lamp already created, we will use that as our starting point; so let’s get a point lamp in place. To add a lamp to our scene:
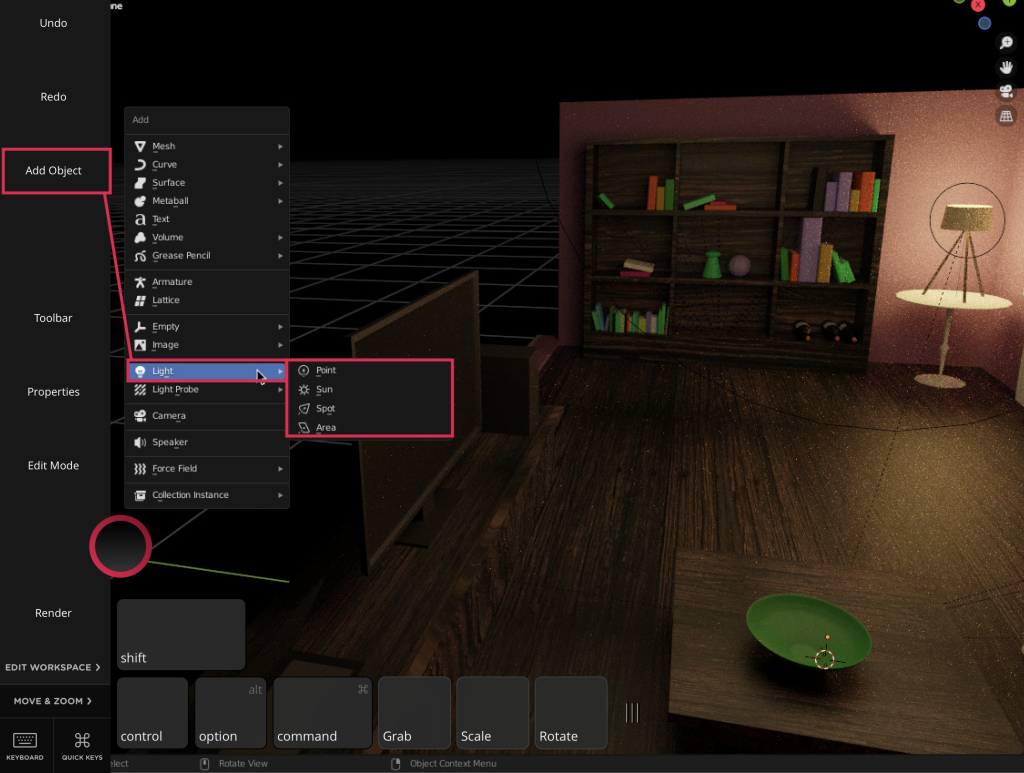
- Either use our Add Object shortcut or type Shift+A to bring up the Add Object menu.
- Select Light
- Then select the lamp you want to add to your scene. For this instance, we will want a Point lamp.
Once your lamp is added to your scene, you can then use the Grab and Scale quick keys to place the lamp within the confines of your scene’s modeled light source. I have placed mine where a bulb would normally shine from in the lampshade of the corner lamp of my scene. From here, you will simply need to decide the mood you want your lighting to set; this means choosing color, brightness, and whether or not it casts shadows for realism.
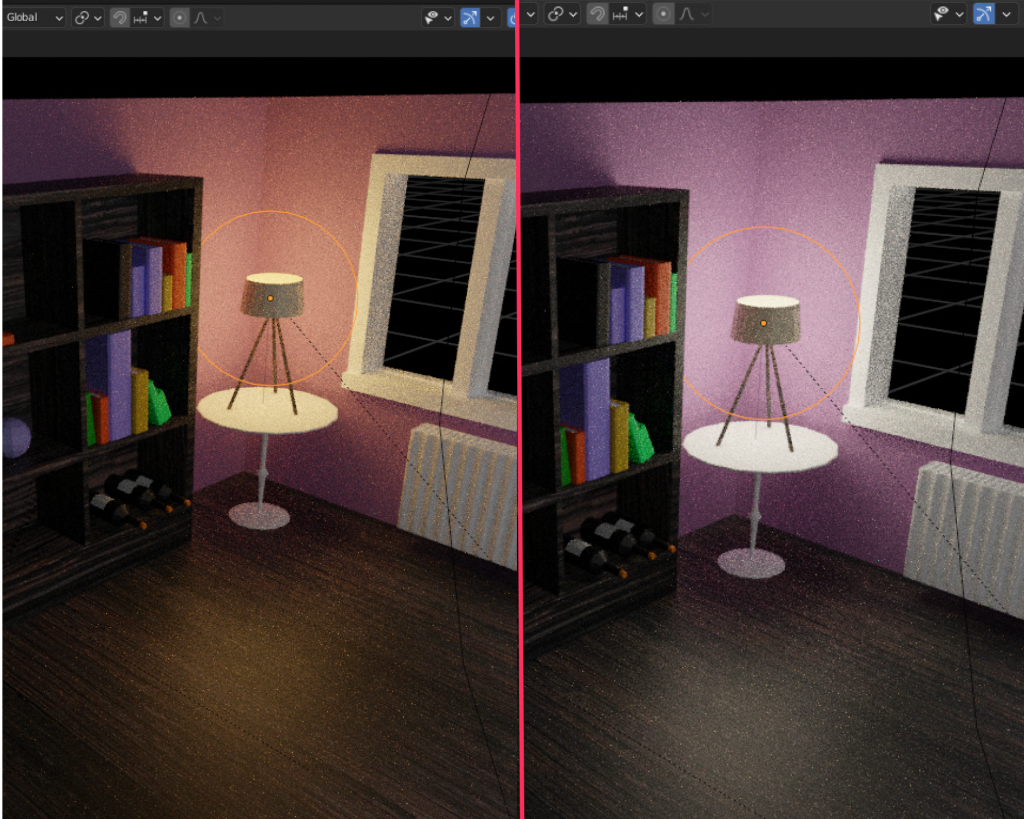
In the comparison photo above, I am using the render preview feature to get the best idea of what my lighting choices look like without going through a full render. While this makes things look a little fuzzy as a result, we can still get a good feel of how our lighting and textures look.
Using a more yellow-tinted light provides a bit more of a homely feel and with the pink wallpaper, it may bring to mind a grandparent’s home, or a childhood bedroom. With the white light, we get a slightly more modern and maybe sterile feeling environment, even with the pink wallpaper. White lighting is typically achieved through the more modern LED lights and is common for newer homes and office spaces.
In both examples, I have shadows enabled so that we get a realistic shadow under the table and around the bookshelf. Without shadows enabled, we would get an environment that is a bit more flat and akin to a video game.
Add an overhead light
While we may not have a full ceiling light modeled in our scene, we can still place a lamp where the ceiling would be to improve the realism of our final render. For this, we can Add Object once more and select another Point lamp. This one will be placed where our ceiling would be and since it is encompassing a much larger area, we will want to increase the radius on it.
Lighting from electronics
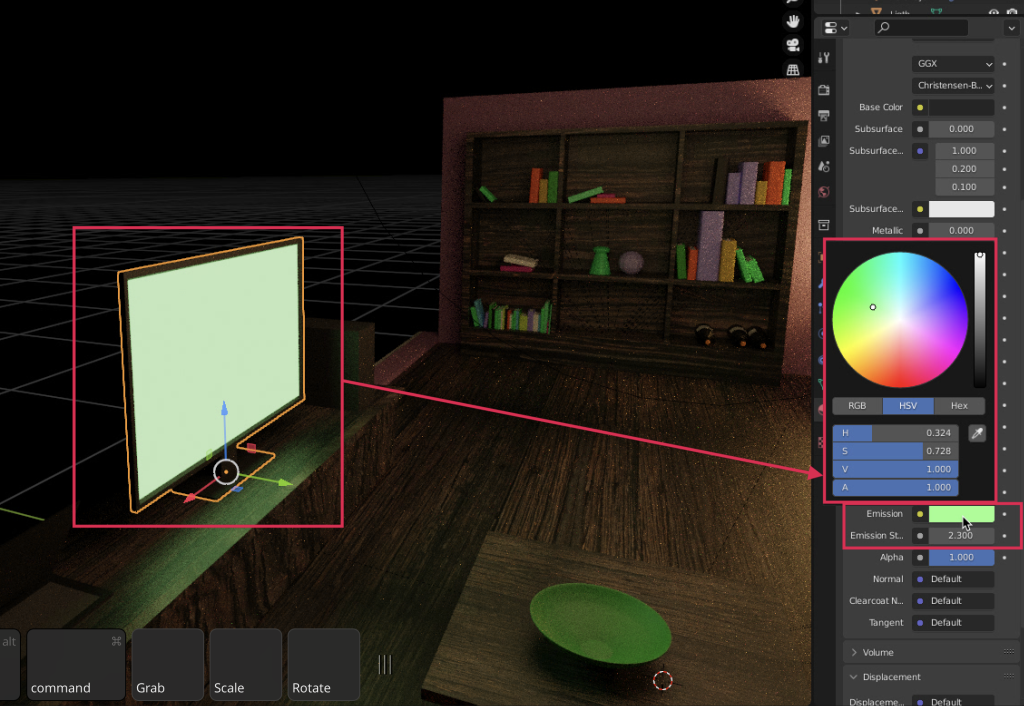
As a bonus, if you have electronics in your scene like a TV or computer, you can also utilize them as light sources. This type of lighting will not involve any lamps but will instead come from the texture of the model. On the television in this scene, we have two separate textures for its body and screen. To change the screen texture into one that emits light, we will need to:
- Select the model
- Tap on the Materials button on the right-hand menu. The icon should look like a red beach ball.
- Select the material for the screen, or whatever part of your model you would like to emit light.
- Enable Emission in the menu that appears under your selected material by clicking on the dot next to it, and from here you can change the color of the light emitted from this texture.
- Under Emission, you can also adjust the Emission Strength which will dictate how much light the texture will emit into your scene.
Render the scene
To see a polished version of your scene, you can select Render in the Astropad Sidebar, or select it from the top left of your desktop.
Get started today with Blender on your iPad
Get the most out of Blender with your iPad! Try out Astropad Studio with our free 14-day trial. No commitments, cancel any time.

- Mirror any desktop app on your iPad
- Compatible with Mac and PC
- Build your own shortcut panel, custom gestures, and custom quick keys
- Utilize pressure-sensitive and precise sculpting and painting
- Connects over WiFi or USB cable